Pocket Handbook
Sorry. We’re having trouble copying to your clipboard.
Try directly copying the link below.
Interface
Layers offer you freedom to experiment. You can work in front of or behind existing elements of your painting. Plus, move, duplicate, edit and blend the results without altering other layers.
The Layers Panel
The Layers panel offers a clean interface with a variety of powerful options only a touch away.
The Layers button looks like a pair of overlapping squares. It sits in the top-right menu bar of Procreate Pocket's interface.
Tap it to bring up the Layers panel.
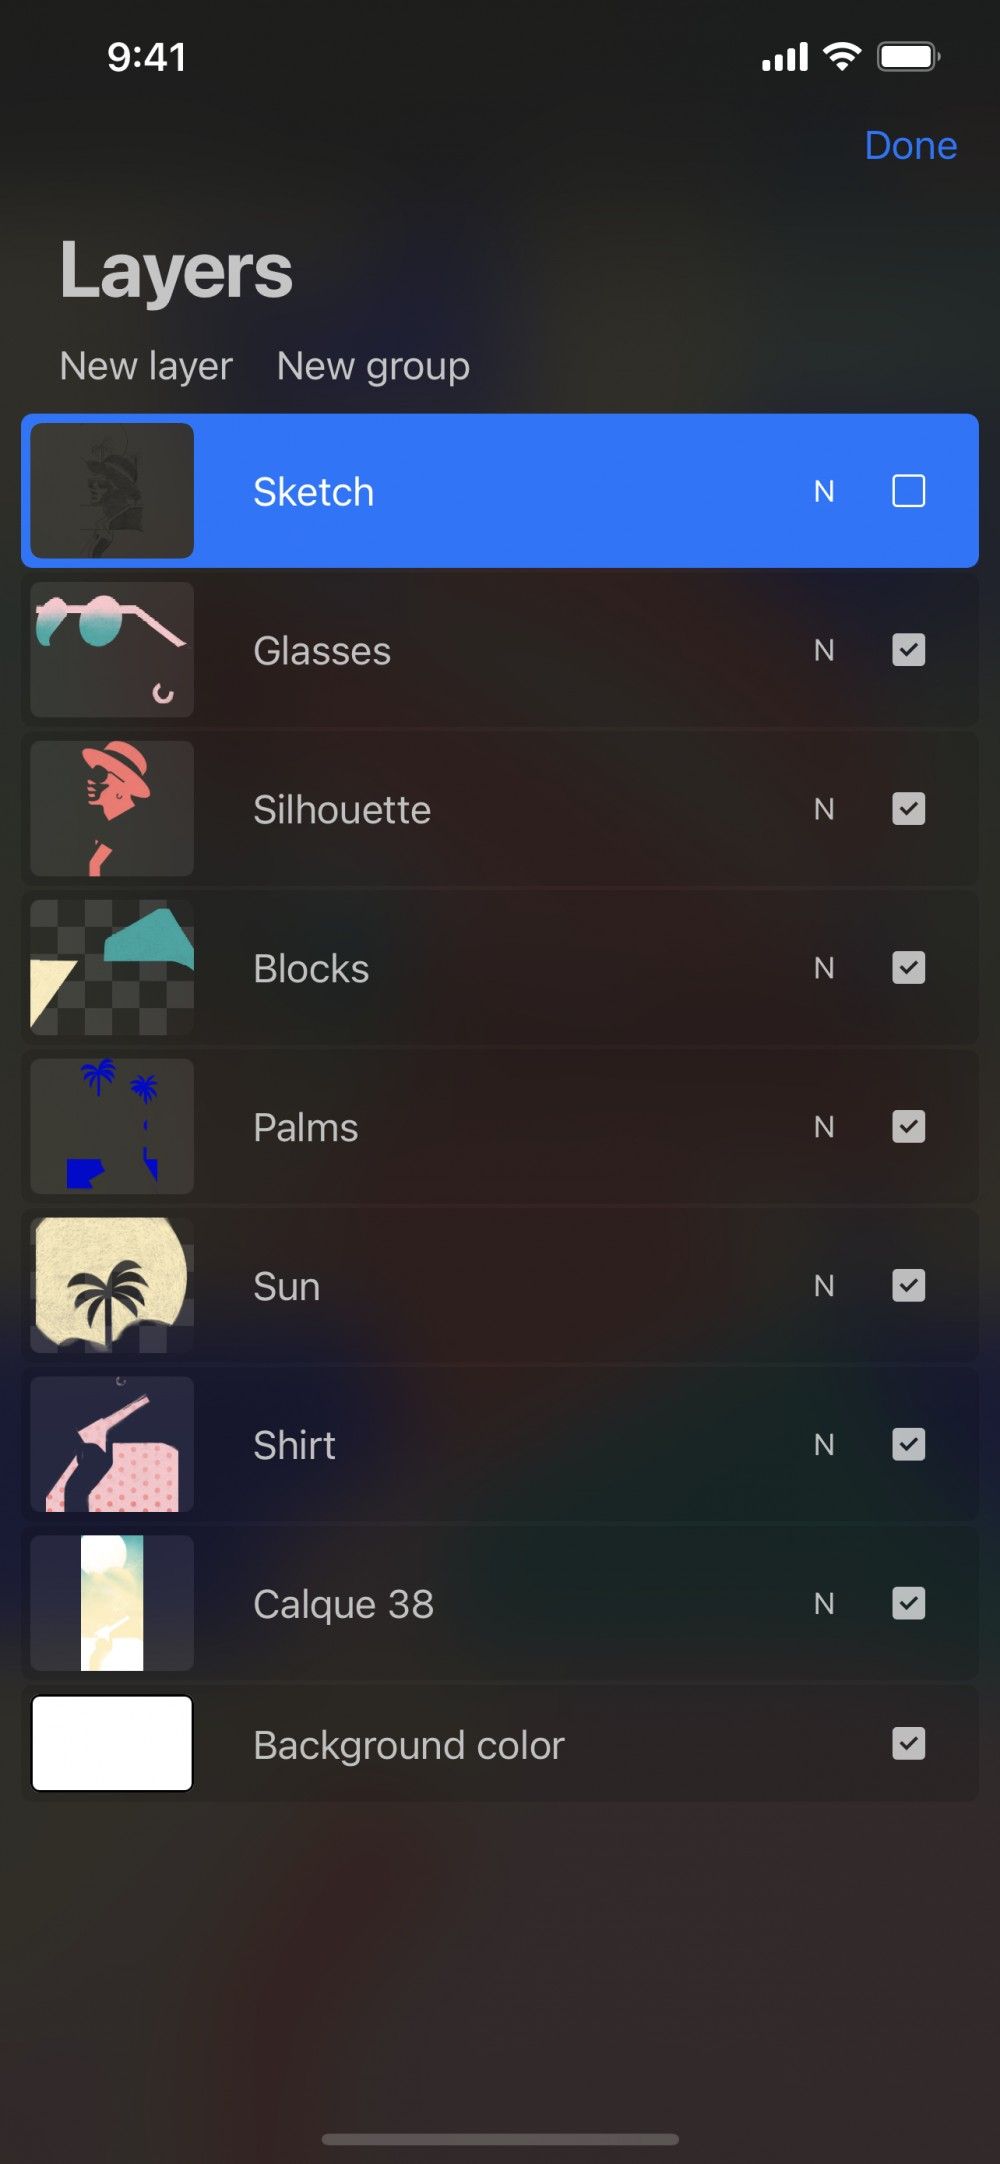
You'll find New Layer in the top left corner.
Tap it to add a new layer.
Learn more about Creating Layers .
The Layer thumbnail offers a small-scale preview of each layer's contents.
Customizable layer names give you another way to track which content sits on what layer. This helps you keep your artwork organized.
Learn more about Naming Layers .
Any changes you make on the canvas will affect your currently selected layer. Procreate Pocket makes it easy by highlighting your currently selected layer in blue.
You can select another layer by tapping it.
Learn more about Layer Selections .
Blend Modes lets you blend the contents of multiple layers together in various ways. This lets you create and mix a variety of visual effects.
Tap the small letter/s on the right-hand side of a layer to bring up Blend Mode options.
Learn more about Blend Modes .
Tap the Visibility Checkbox to hide or show a layer.
Press and hold the Visibility Checkbox on a layer to view the contents of a single layer in isolation. This will display only the active layer, hiding all others. Press and hold again to show every layer.
Each Procreate Pocket document comes with an inbuilt Background Color layer.
Tap this to select a new background color for your artwork, or hide it by tapping its Visibility Checkbox.
Pro Tip
Hide the Background Color to create an artwork with a transparent background. This is perfect for exporting art as a PNG.
Layer Options Menu
The Layer Options menu offers you a broad range of ways to interact with layers at a touch.
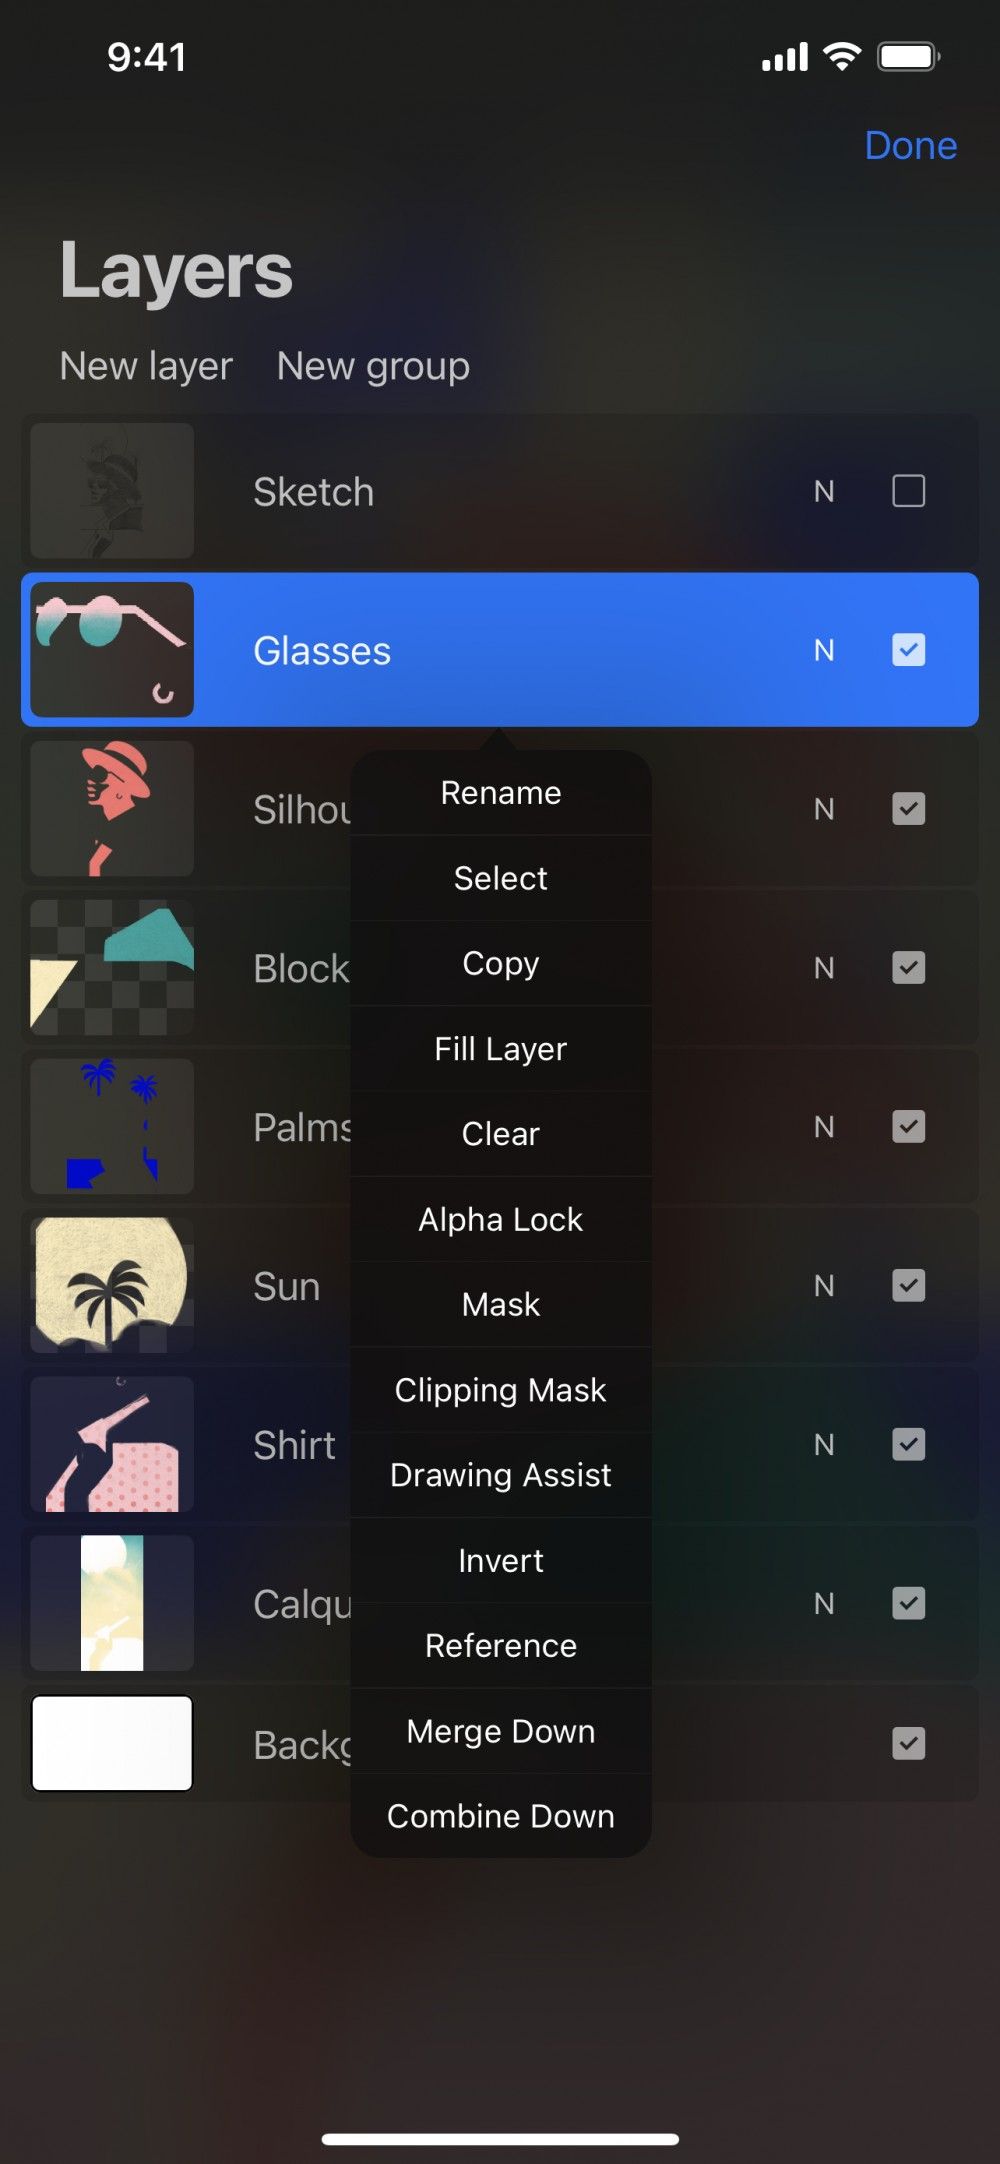

Once you have the Layers panel open, select a layer by tapping on it. Tap it again to access the Layer Options menu.
Learn more about Layer Options .
Sorry. We’re having trouble copying to your clipboard.
Try directly copying the link below.
Still have questions?
If you didn't find what you're looking for, explore our video resources on YouTube or contact us directly. We’re always happy to help.