Pocket Handbook
Sorry. We’re having trouble copying to your clipboard.
Try directly copying the link below.
Chromatic Aberration
Add a Chromatic Aberration effect to your images.
Chromatic Aberration
Shift the red and blue plane of RGB images to mimic a camera lens’ Chromatic Aberration effect. In photography this effect is quite subtle and looks like a slight blue or red halo. Procreate Pocket gives you complete control of the direction and distance of the aberration. This allows you to exaggerate this effect.
Tap Modify > Adjustments > Effects > Chromatic Aberration to enter the Chromatic Aberration interface.
The Chromatic Aberration filter come with two different modes:
Perspective allows you to set a focal point from which the Chromatic Aberration occurs.
Displace allows you to shift the Chromatic Aberration horizontally and vertically.
Perspective Mode
Apply Chromatic Aberration radially from a focal point anywhere on your canvas.

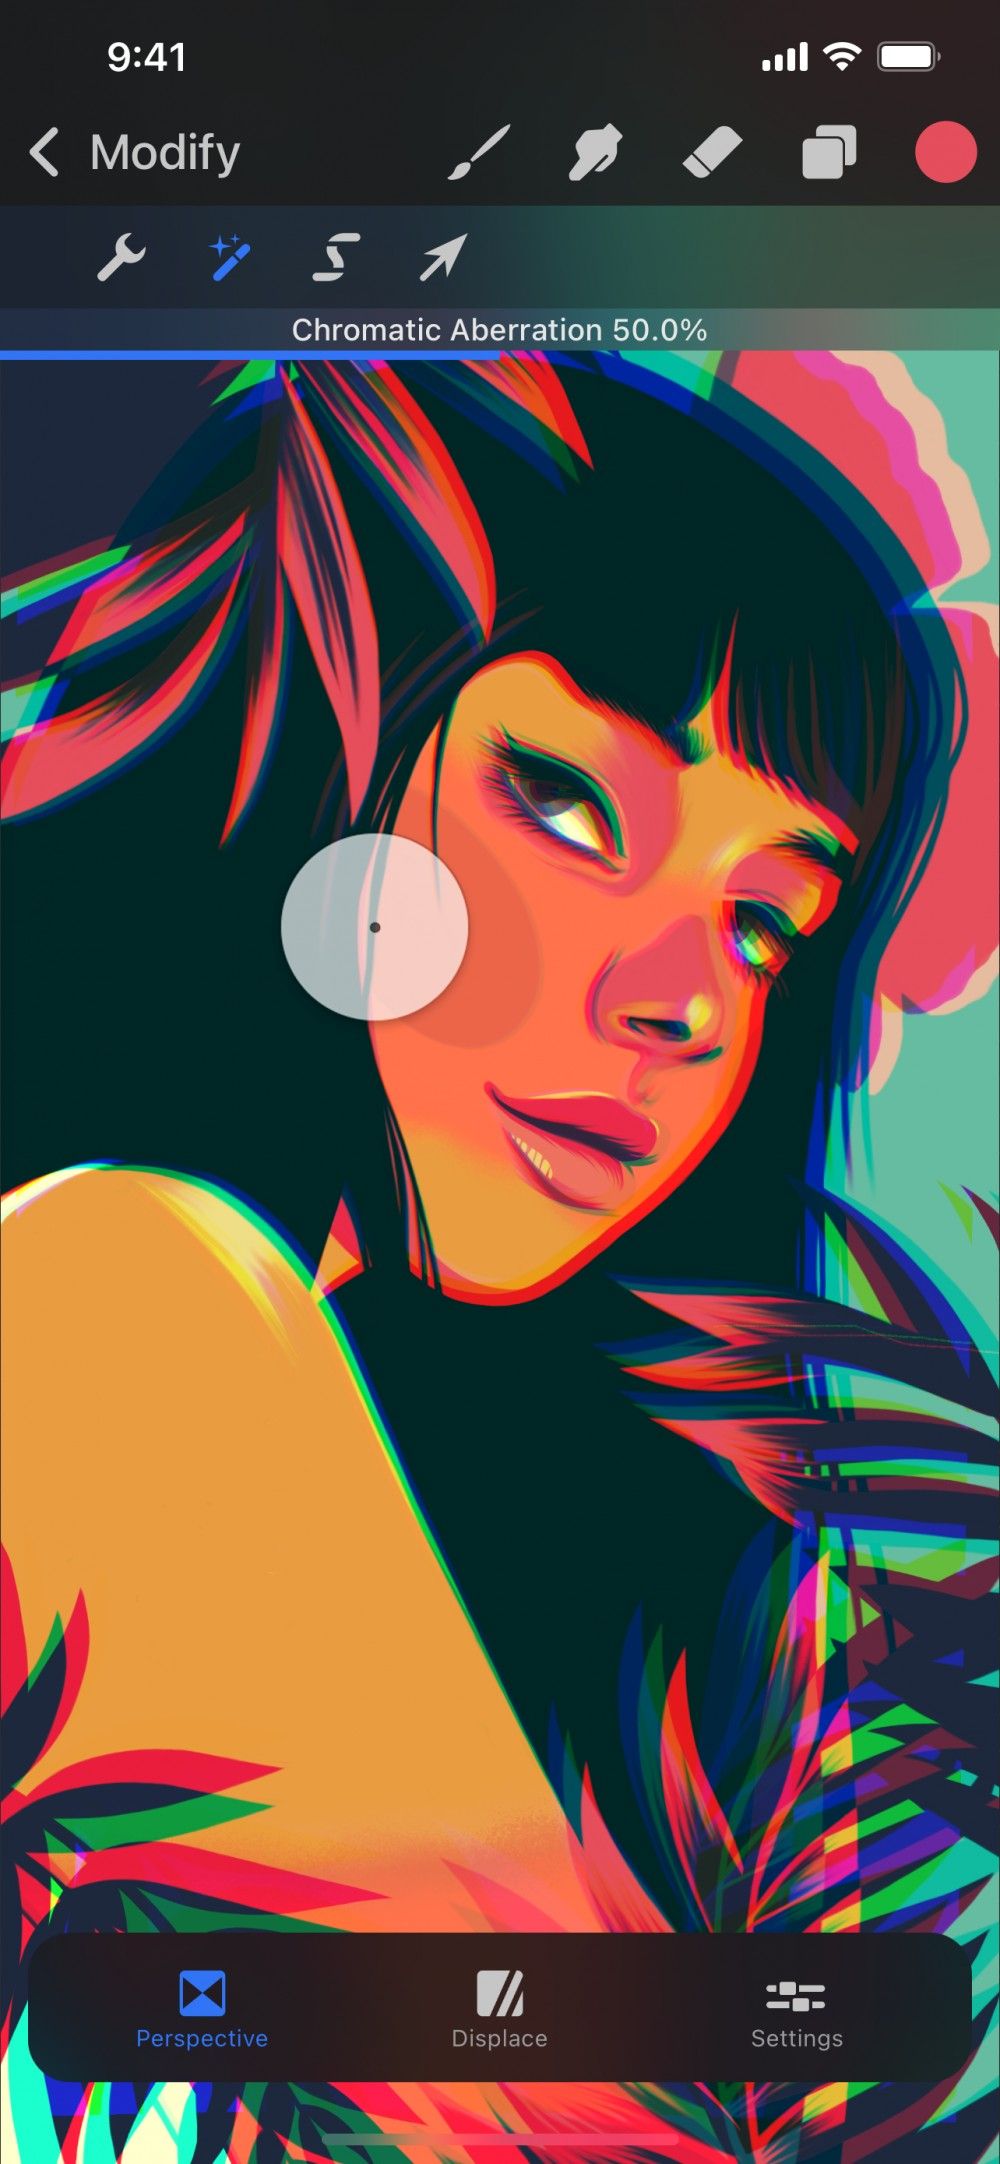
Slide right and left to change the amount of Chromatic Aberration that is applied to an image.
At the top of the canvas you’ll see a bar labelled Chromatic Aberration. This bar displays the amount of Chromatic Aberration applied to your image as a percentage.
Initially this is set at 0% Chromatic Aberration. Drag your finger right to increase the amount of red and blue separation. Drag your finger left to reduce the amount of separation.
Interface
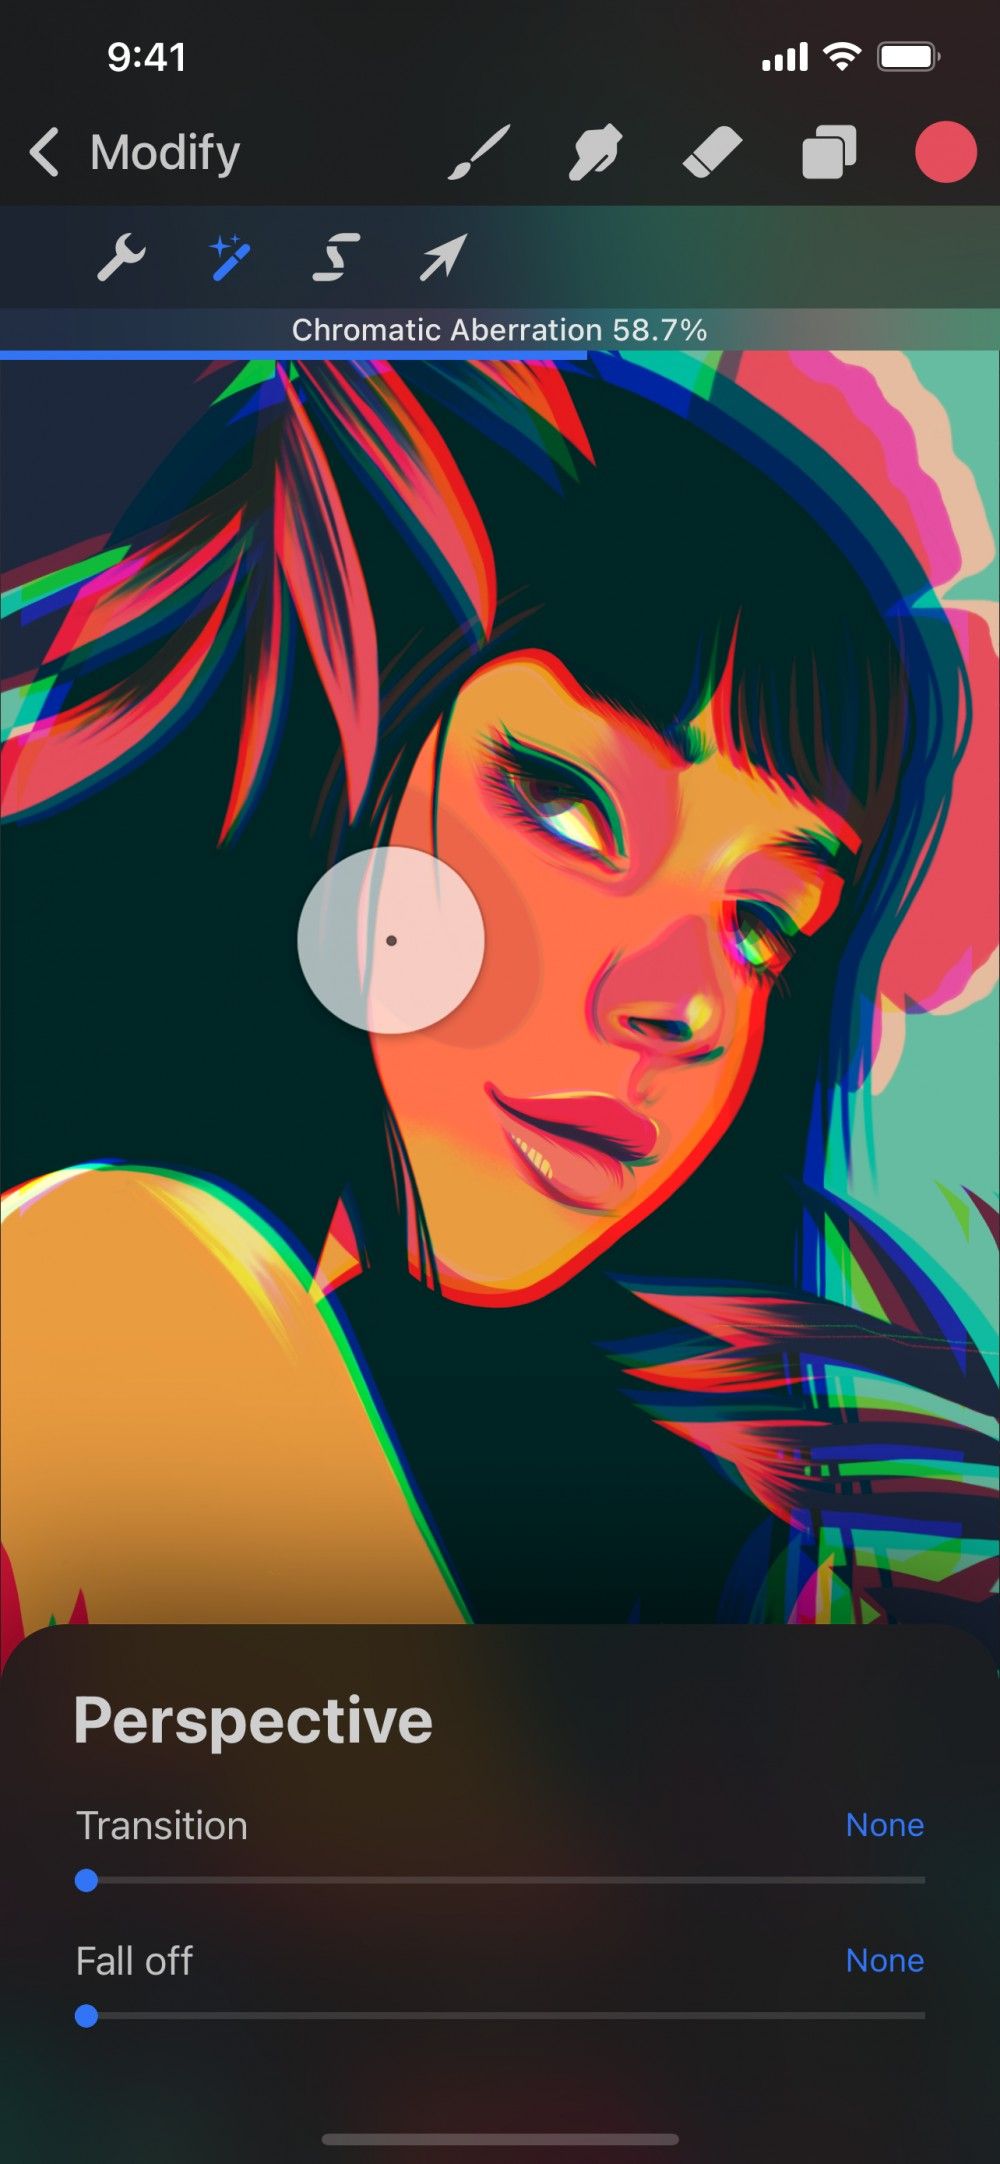
Set a Focal Point and control the amount of Transition and Fall off the Chromatic Aberration has by opening the Settings Tab while on Perspective.
When Chromatic Aberration first activates you will see a small shaded circle in the centre of your canvas — this is the Focal Point. The Chromatic Aberration will radiate out from the centre of the Focal Point. This becomes more exaggerated the further from the centre of the Focal Point it is.
Touch and drag the white dot in the centre of the Focal Point to place it where you want. You can place the focal point inside and outside of your canvas. To place a Focal Point outside of your canvas, reduce the size of the canvas. Then drag the Focal Point into your desired position outside of the canvas area.
The Transition slider controls the amount of blur applied to the Chromatic Aberration that radiates out from the focal point. 0% will give the edge of the Chromatic Aberration a subtle, soft appearance. 100% will make this edge harder and more visibly defined.
The Fall off slider controls the radial distance from the Focal Point before any effect is applied. 0% will apply the Chromatic Aberration directly from the edge of the Focal Point. 100% will apply a clear Fall off area from the Focal Point to the edge of the canvas before the effect is applied.
Experiment to get a visual understanding of how Transition and Fall off affect Chromatic Aberration. Slide the amount of Chromatic Aberration up to 100% and then move the Transition and Fall off sliders back and forth.
Displace Mode
Apply Chromatic Aberration across your entire image.
Unlike Perspective mode, Displace doesn’t use a focal point. Displace affects the Chromatic Aberration on an image by allowing you to drag the effect wherever you want it.

Control the amount and direction of Chromatic Aberration with a gesture.
When in Displace mode, touch and drag to set the distance and the direction of your Chromatic Aberration's red and blue planes
Interface
Adjust the amount of Blur and Transparency your Chromatic Aberration has by opening the Settings Tab while on Perspective.
To adjust Blur and Transparency tap Settings while using Displace Mode.

The Blur slider controls the amount of blur applied to you Chromatic Aberration. Initially this is set to 0% or zero Blur. Moving the slider to the right will increase the softness and blur of your Chromatic Aberration.
The Transparency slider controls the amount of transparency applied to you Chromatic Aberration. Initially this is set to 0% or zero Transparency. Moving the slider to the right will decrease the Transparency of your Chromatic Aberration.
Commit Changes
Commit all changes with one touch.
To commit your changes and leave Adjustments, Tap the Adjustments icon again.
To commit to changes and stay in Chromatic Aberration, Tap the canvas to invoke Adjustment Actions and Tap Apply.
Sorry. We’re having trouble copying to your clipboard.
Try directly copying the link below.
Still have questions?
If you didn't find what you're looking for, explore our video resources on YouTube or contact us directly. We’re always happy to help.