If you've seen the promo video for the latest Procreate update, you'll already have seen the stunning opening shot depicting the new Liquify filter at work. The image swirls around and blends, and then fluidly reforms under the touch of a finger. This wasn't a special effect. This shot was filmed using Procreate 4.1. You can do this yourself, and we're going to show you how.
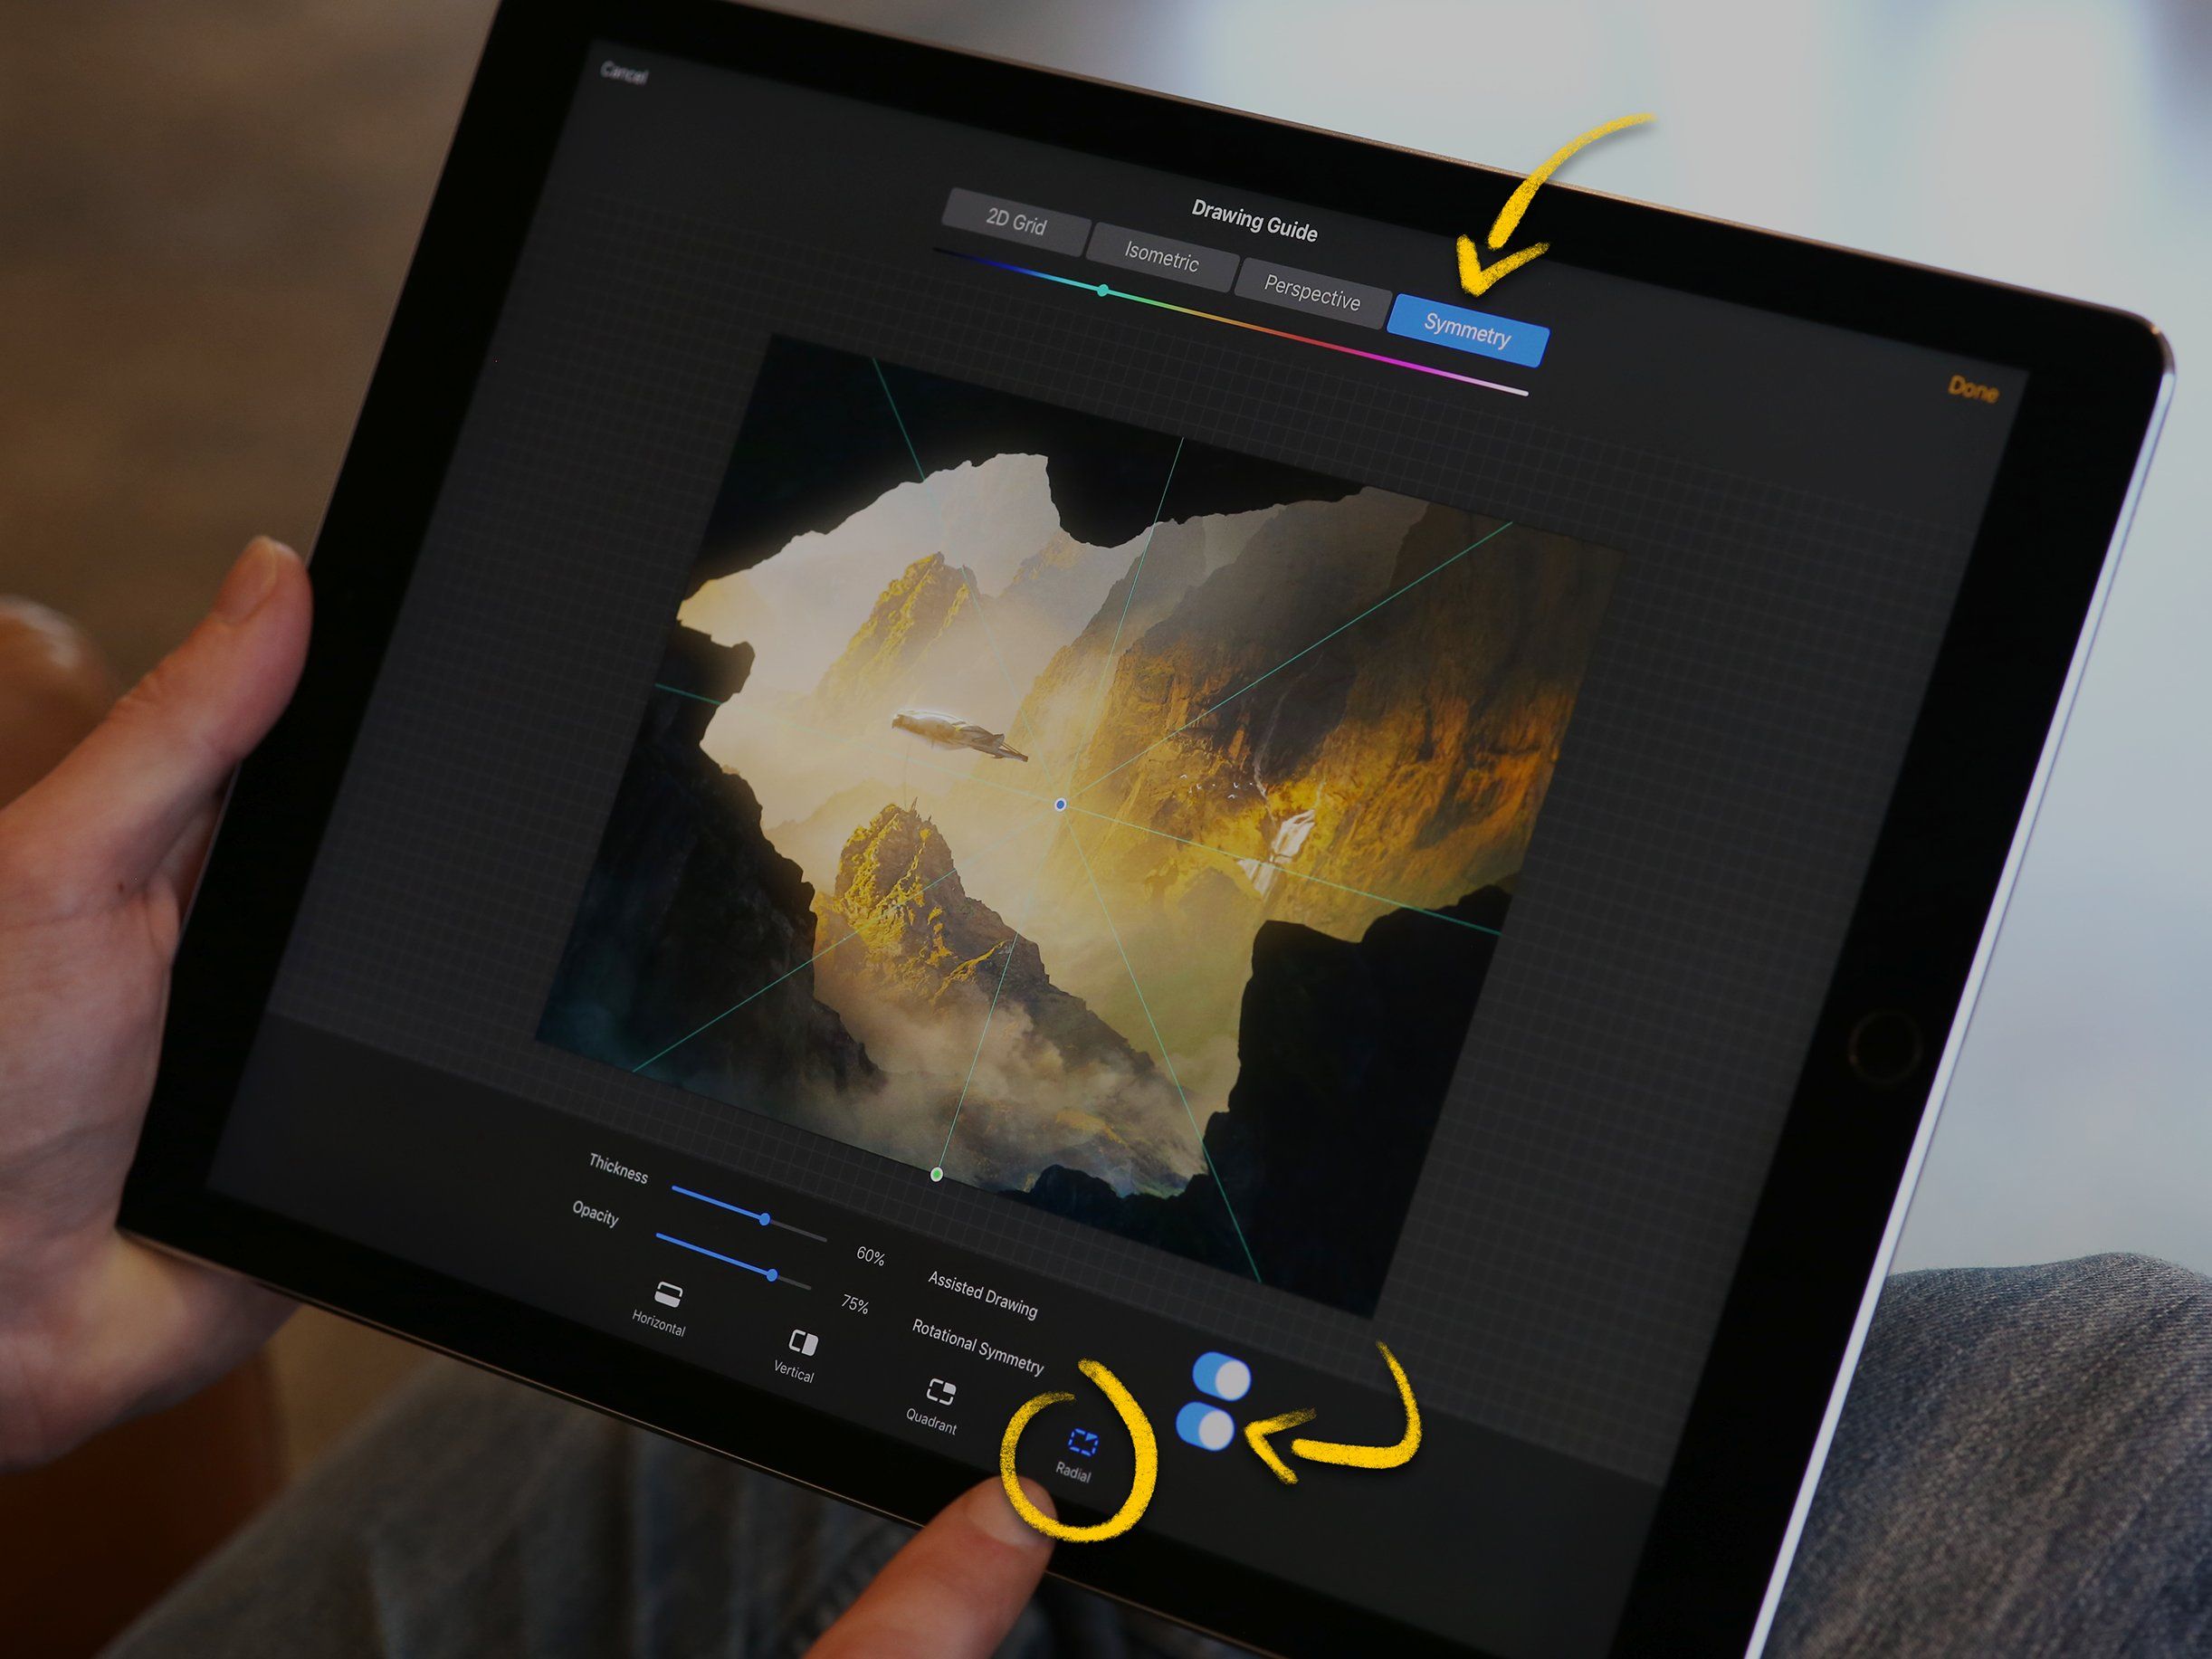
The key to this sequence was the combination of Radial Symmetry with Liquify. To replicate this, you'll need to set up a Radial Symmetry guide using the Edit Drawing Guide option in the Canvas menu. Drawing Assist for any guide, including Symmetry, can be kept active even when the visible guide is hidden. We hid the guide when shooting the video, but we've kept it active in these photos to demonstrate the process. So just create a Symmetry guide, choose the Radial option, and make sure Rotational Symmetry and Assisted Drawing are both turned on.
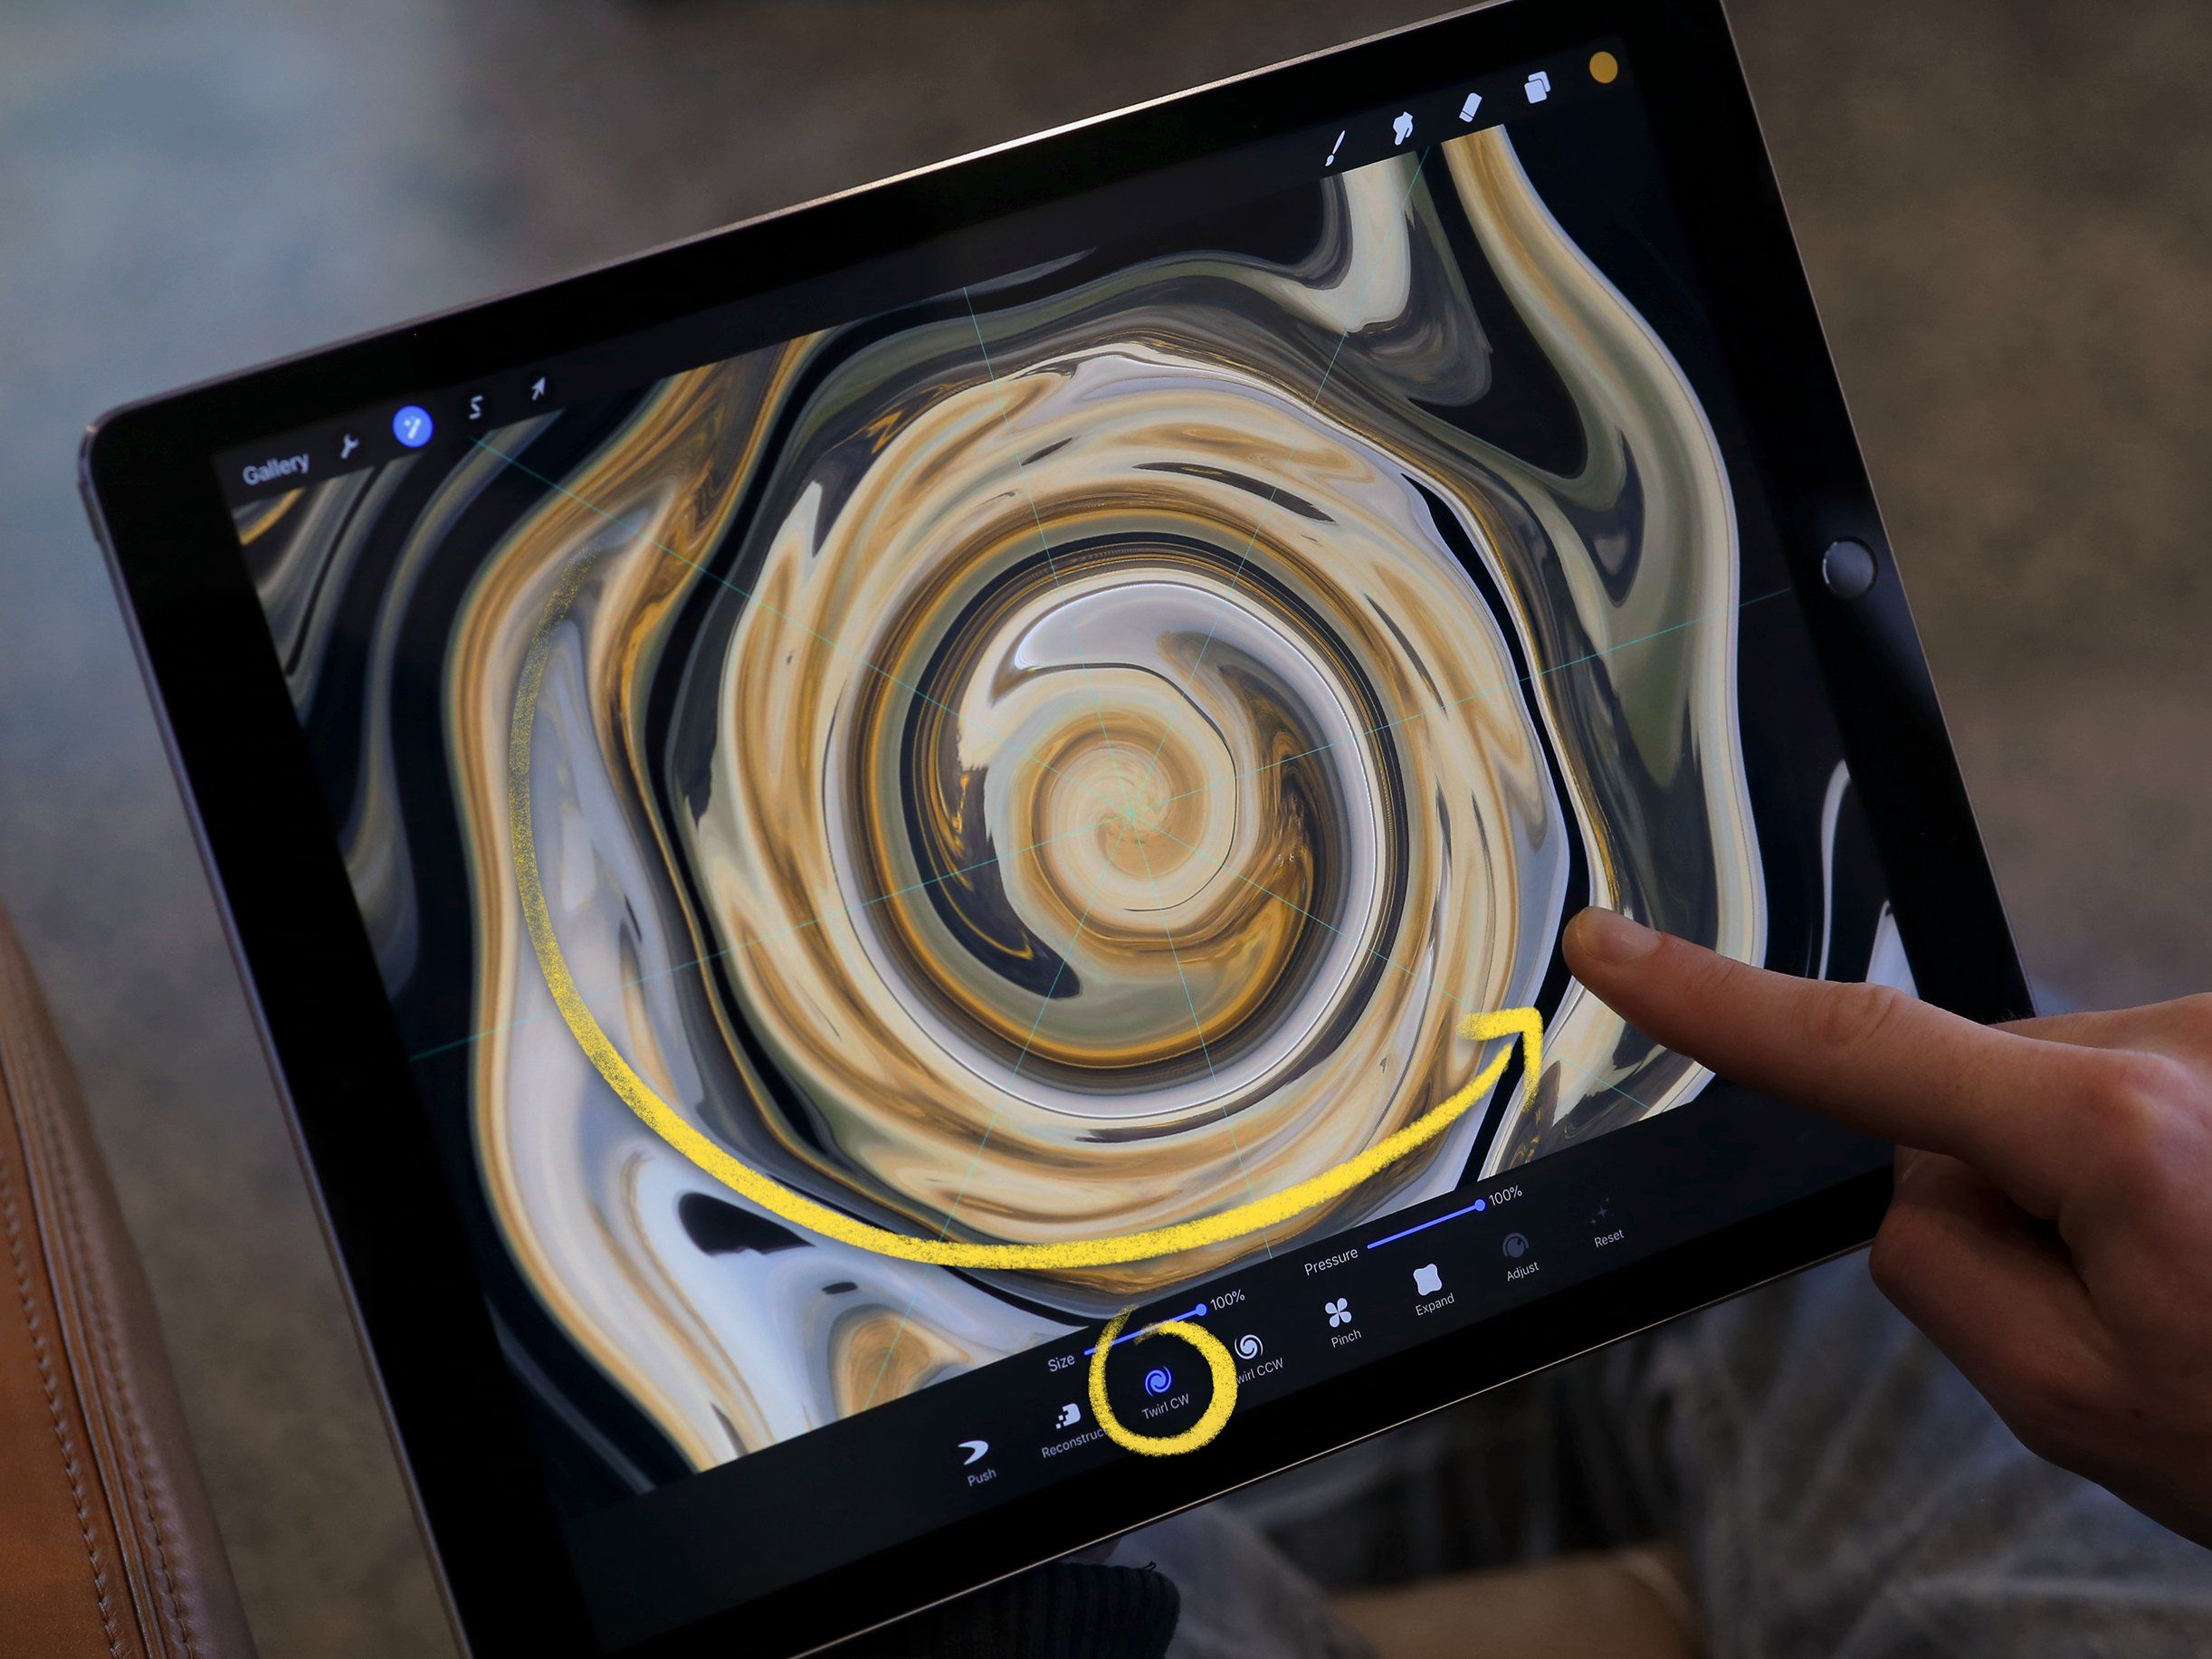
In this instance, we used the Clockwise Twirl effect - 'Twirl CW' in the Liquify toolbar. With the Size and Pressure sliders at maximum, select Twirl CW and begin in the top left corner of the image. Move your finger slowly around the edge of the image in a curve, ending in the bottom right corner. As you approach the middle bottom of the image, the centre of the picture will get caught up in the Twirl as well, blending the whole image into a swirl of colour.
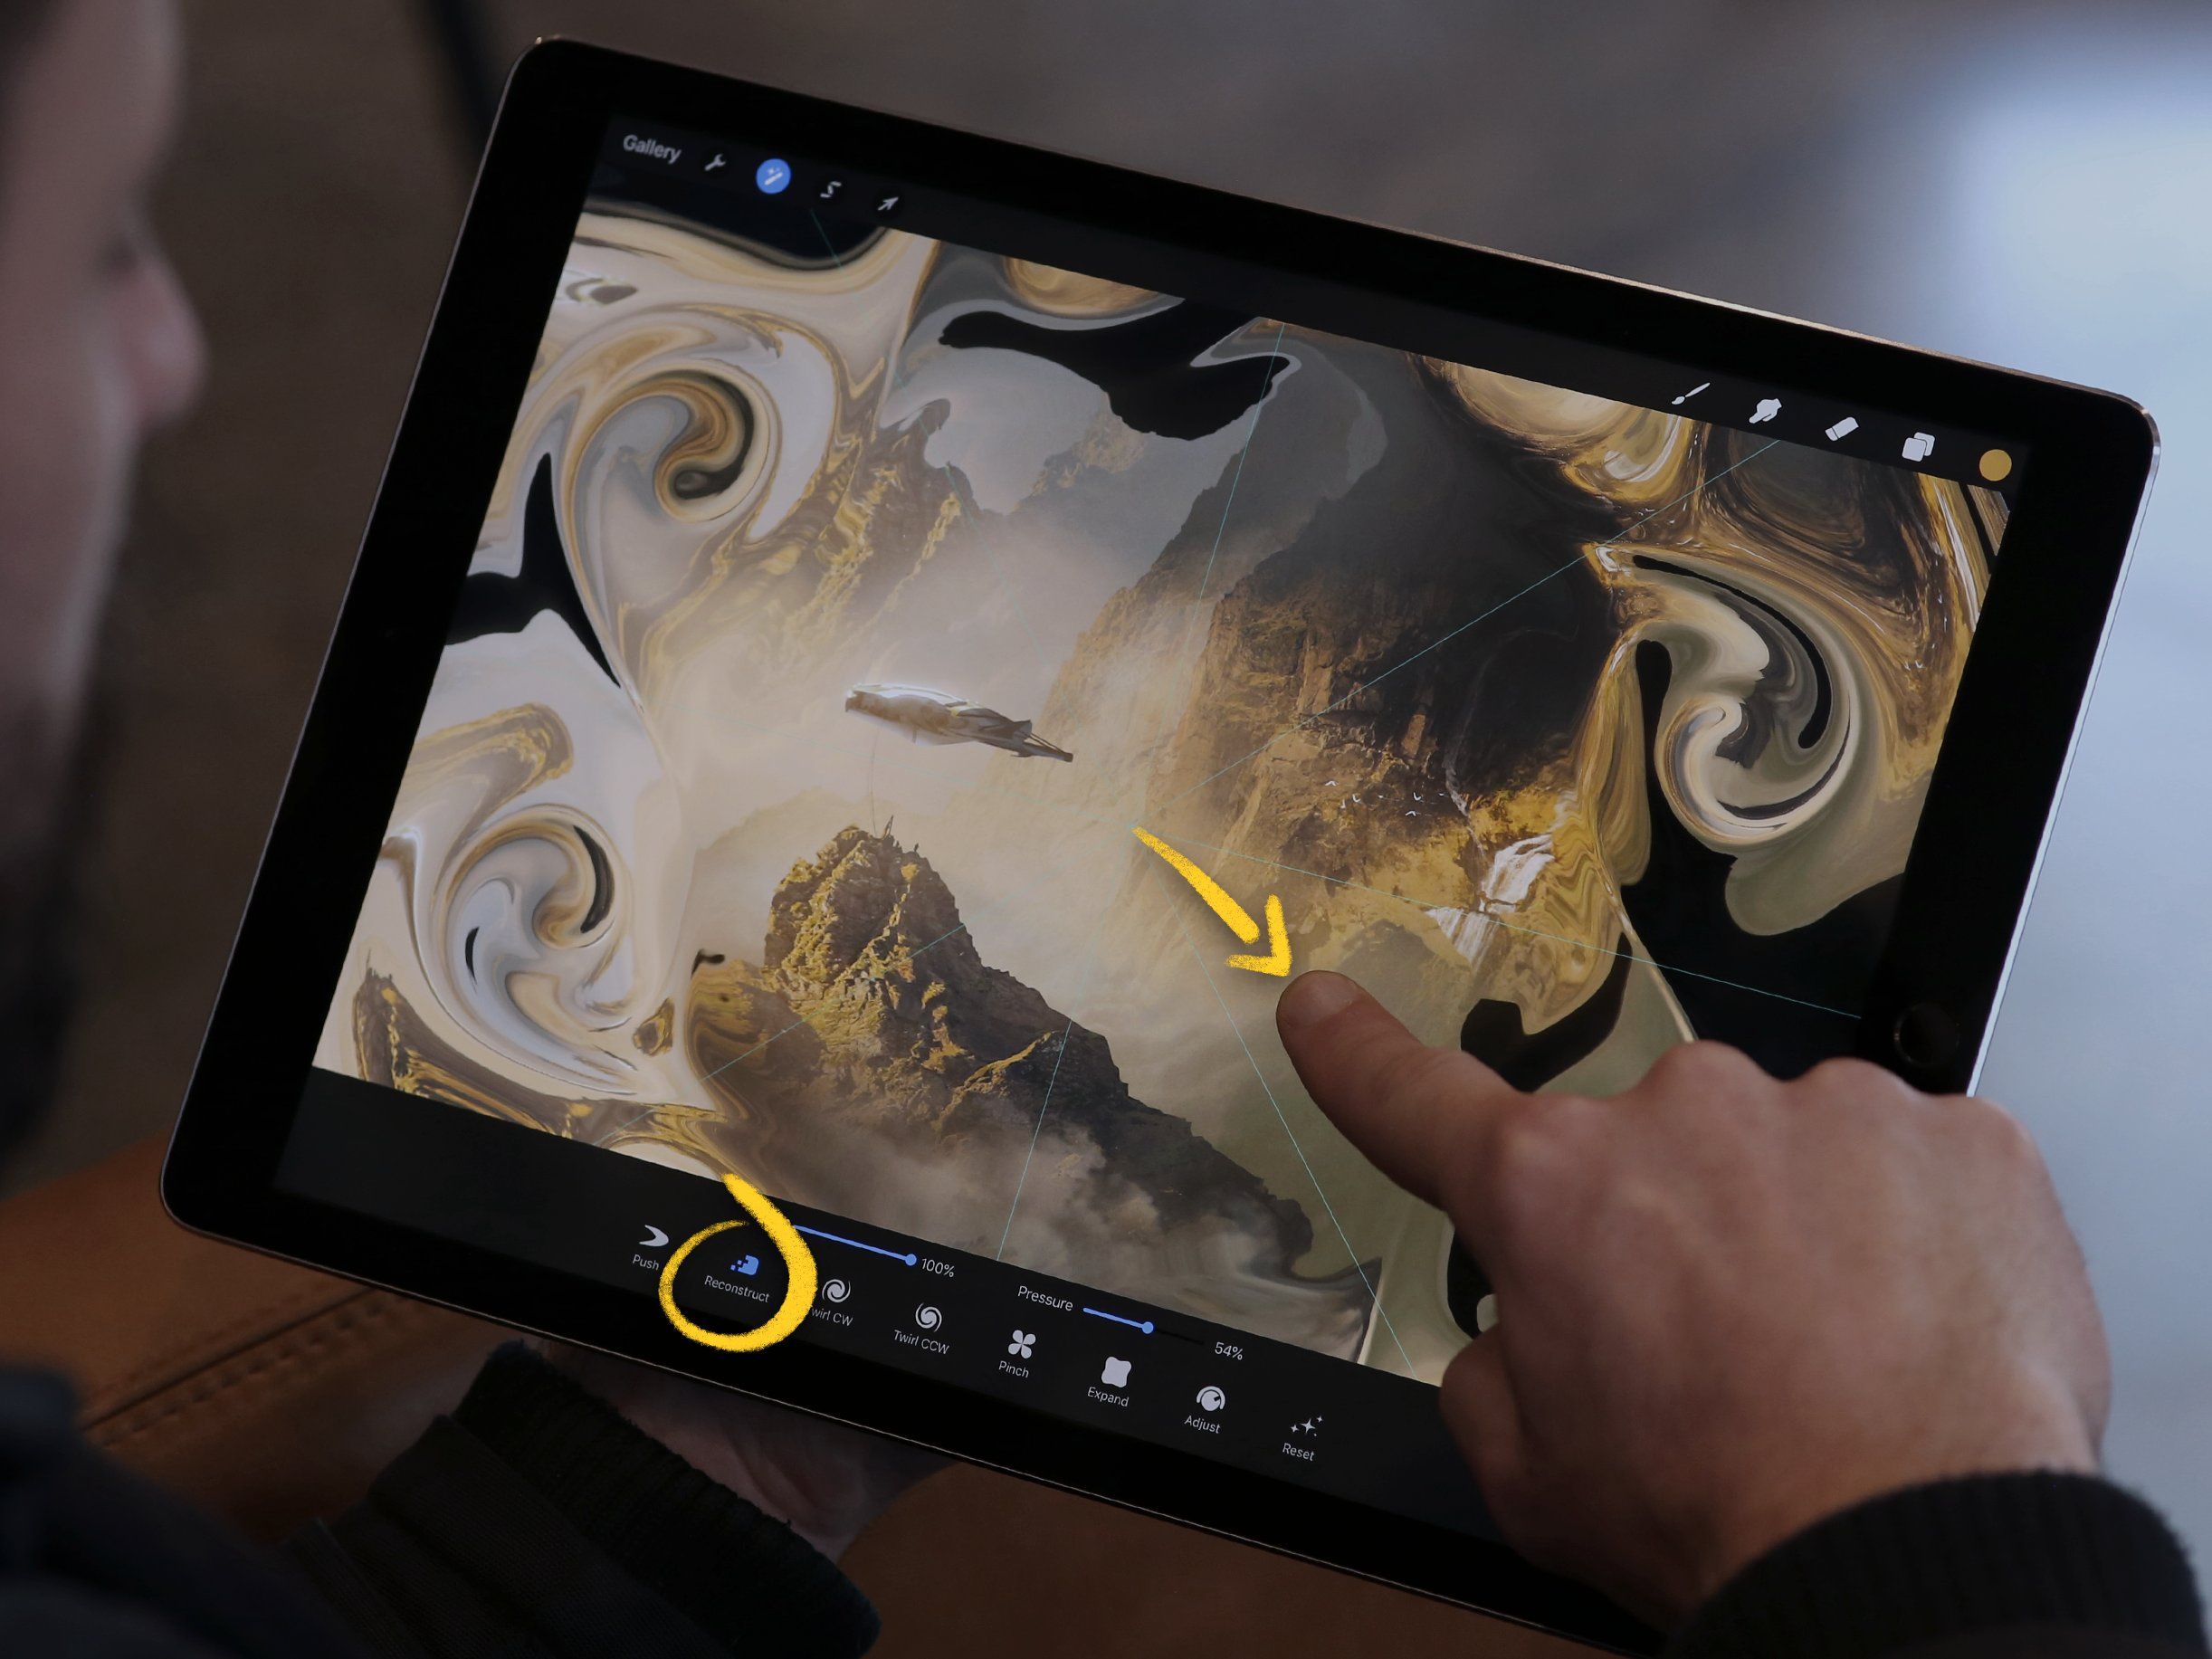
Now comes the magic part. Without exiting the Liquify filter, select Reconstruct. Starting in the centre of the image, drag your finger in a diagonal line to the bottom-right corner of the image. As you approach the bottom right corner of the image, curve your stroke towards the bottom of the screen. The image will reform under your finger, and if the curve is exactly right, you can reconstruct the entire image in one smooth motion.
Don't be discouraged if it doesn't turn out perfectly on the first try - it didn't for us either, and we made it. A lot of prep work and a number of takes went into our promotional video, but everything you see was created and demonstrated entirely in Procreate, with the features you can use right now.

So there it is. Just one example of the fantastic effects that can be made using the new features in the latest Procreate update. Try incorporating ColorDrop or QuickLine with Liquify and Symmetry, and see what incredible things you can create.