When Prof. Emeritus Mihaly “Mike C” Csikszentmihaly, the ‘father of flow’, defined the state as becoming so immersed in the joy of work “that nothing else seems to matter,” artists around the world instantly related. Finding your flow is an essential part of creativity, and one of its greatest joys. Procreate has always aimed to get out of the way of artists and let them do what they do best, create. So here are five things you can do before you start, along with four things you can do whilst using Procreate to get you into the flow and keep you there.
Before you start.
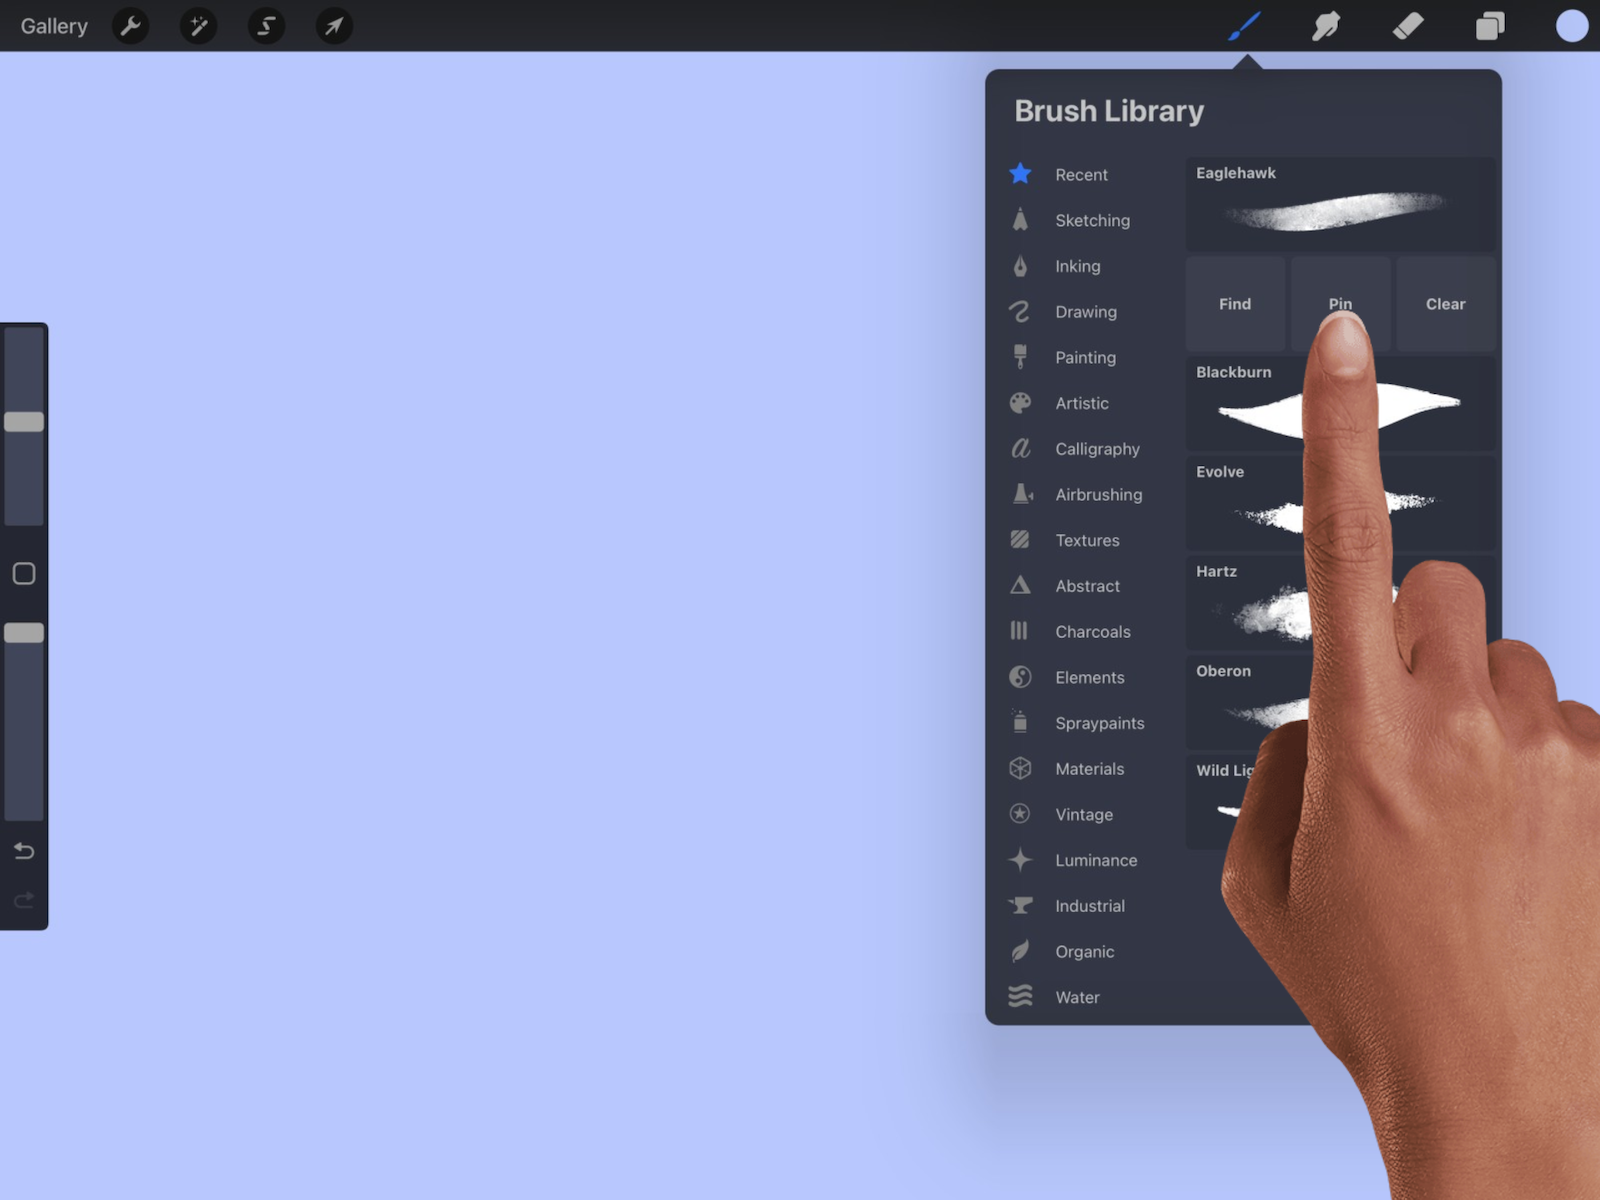
Have your favorite brushes at the ready.
At the very top of your Brush Library marked by a star is a category titled Recent. Here you’ll find the last eight brushes you have used. If there are brushes you know you’ll be using in the future in the Recent section, simply slide left on that brush to reveal a Pin option. Hitting Pin keeps that brush at the top of your Recent category, and top of mind the next time you need to use it.
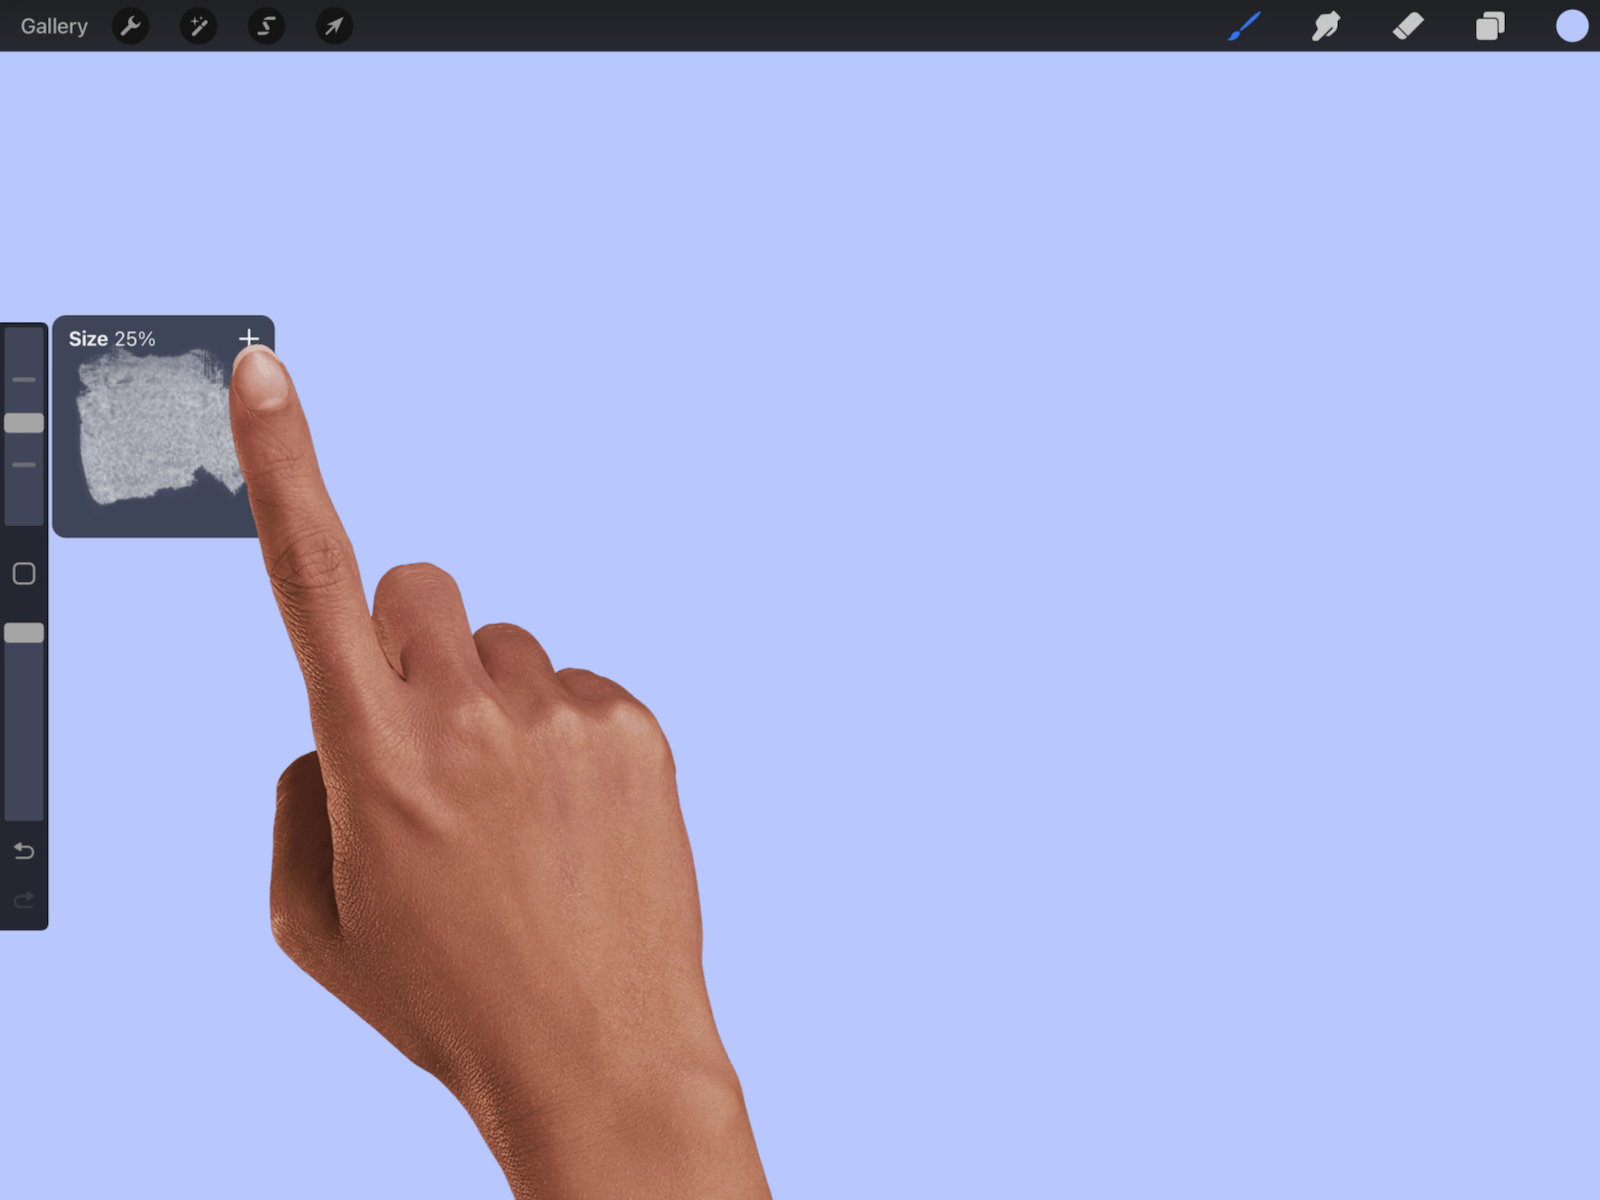
Store all your favorite brush size and opacity settings.
Remembering a brush size you used at the start of a piece hours, or even minutes before can pull you out of your flow. Testing a brush size or opacity on canvas to see if it matches your other strokes is a mechanical, not creative, process. Procreate’s Brush Size Memory feature remembers up to four of your favorite sizes and opacities for each brush. On the Brush Slider, tap or hold your size or opacity slider to open the preview panel, then tap the + symbol in the top-right hand corner to set any size or opacity you wish to remember. This works individually across Paint, Smudge and Erase allowing you to keep different setting across all three if you so desire.
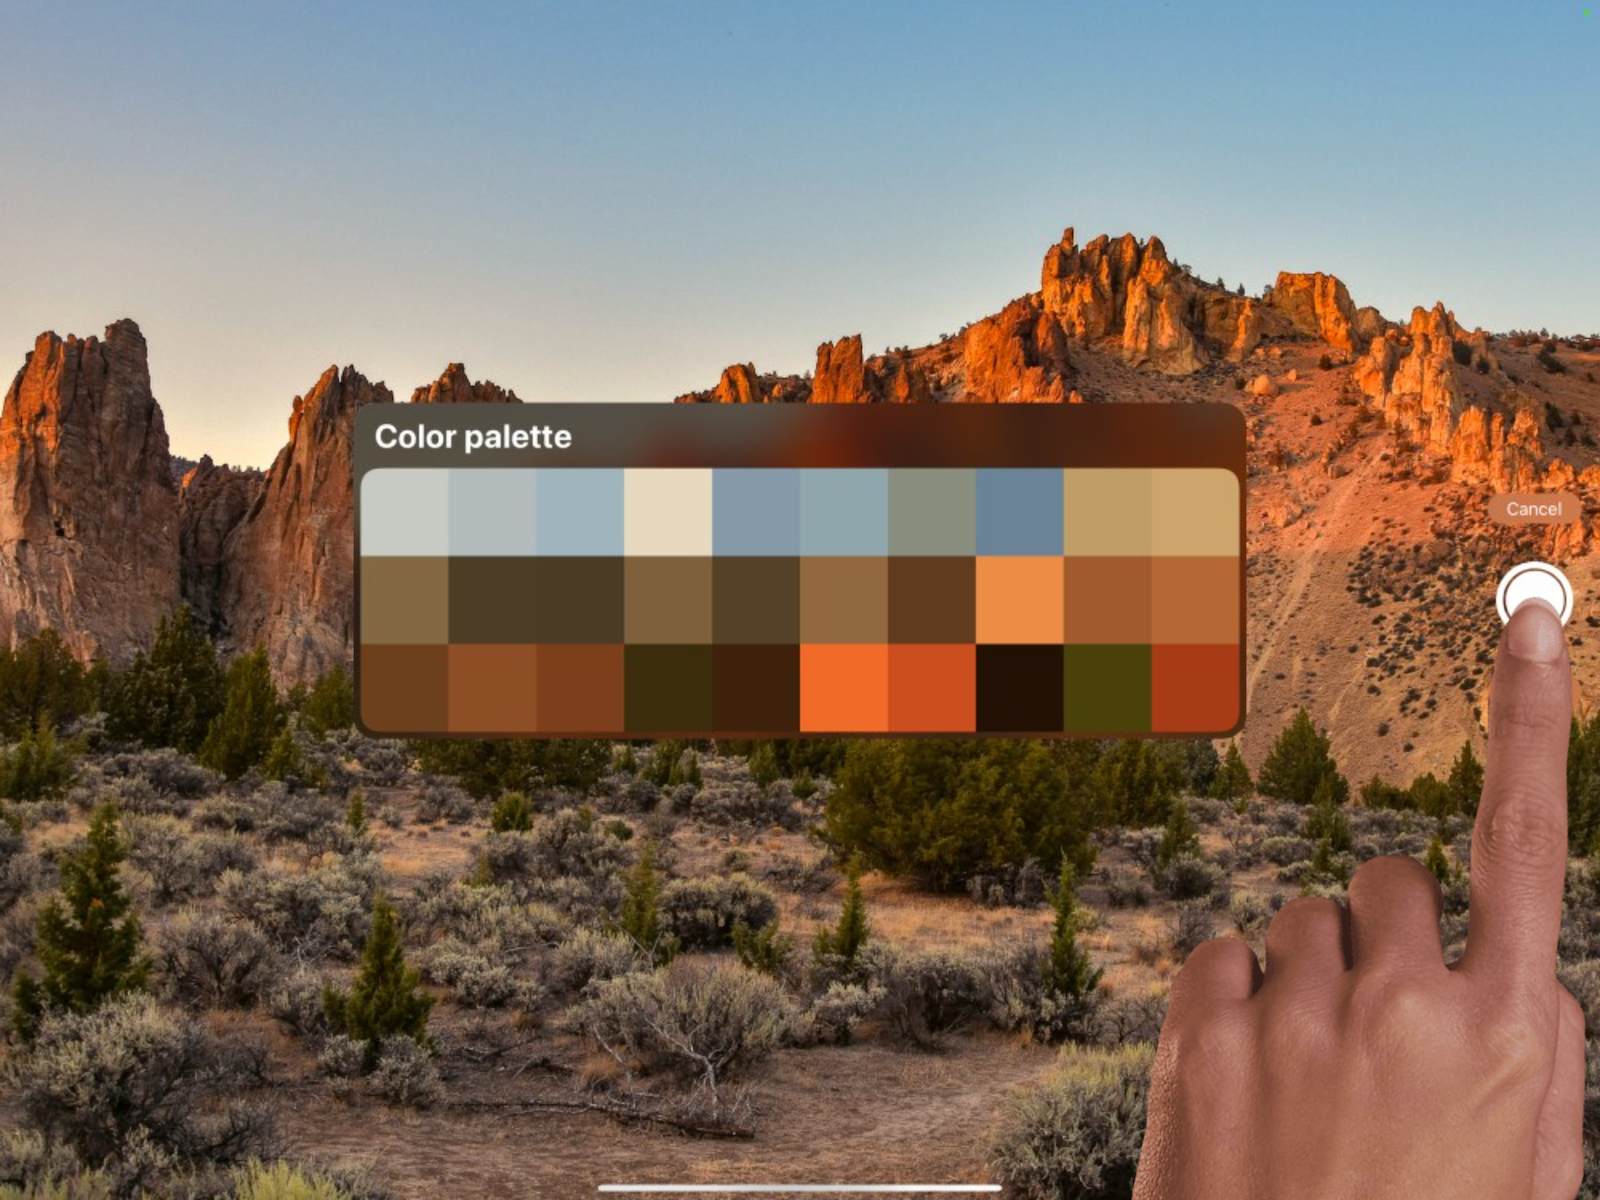
Create an instant custom Color Palette.
Dragging and dropping swatches to create a custom Color Palette before you start working is an excellent way to keep yourself in the zone. But, if you are taking inspiration from the environment around you there’s a much quicker and more accurate way. Palette Capture uses your iPad’s camera to create new custom palettes at the click of a shutter.
Open the Color Panel and tap the Palettes tab, then tap on the + symbol in the top right-hand corner and select New from Camera. Now anything you point your camera at will be broken down into a palette of swatches inspired by the colors around you. Visual mode creates a selection from what is directly in front of the on-screen palette, and Indexed mode creates a selection from what you see across the entire screen. Move your camera around to find a palette you like, and tap the Shutter to capture the palette and instantly add it to your Palette Library.
Already have a photo sitting on your iPad you want to create a palette from? Drag-and-drop it straight onto the Palettes panel for instant results. This works with any web browser image too.
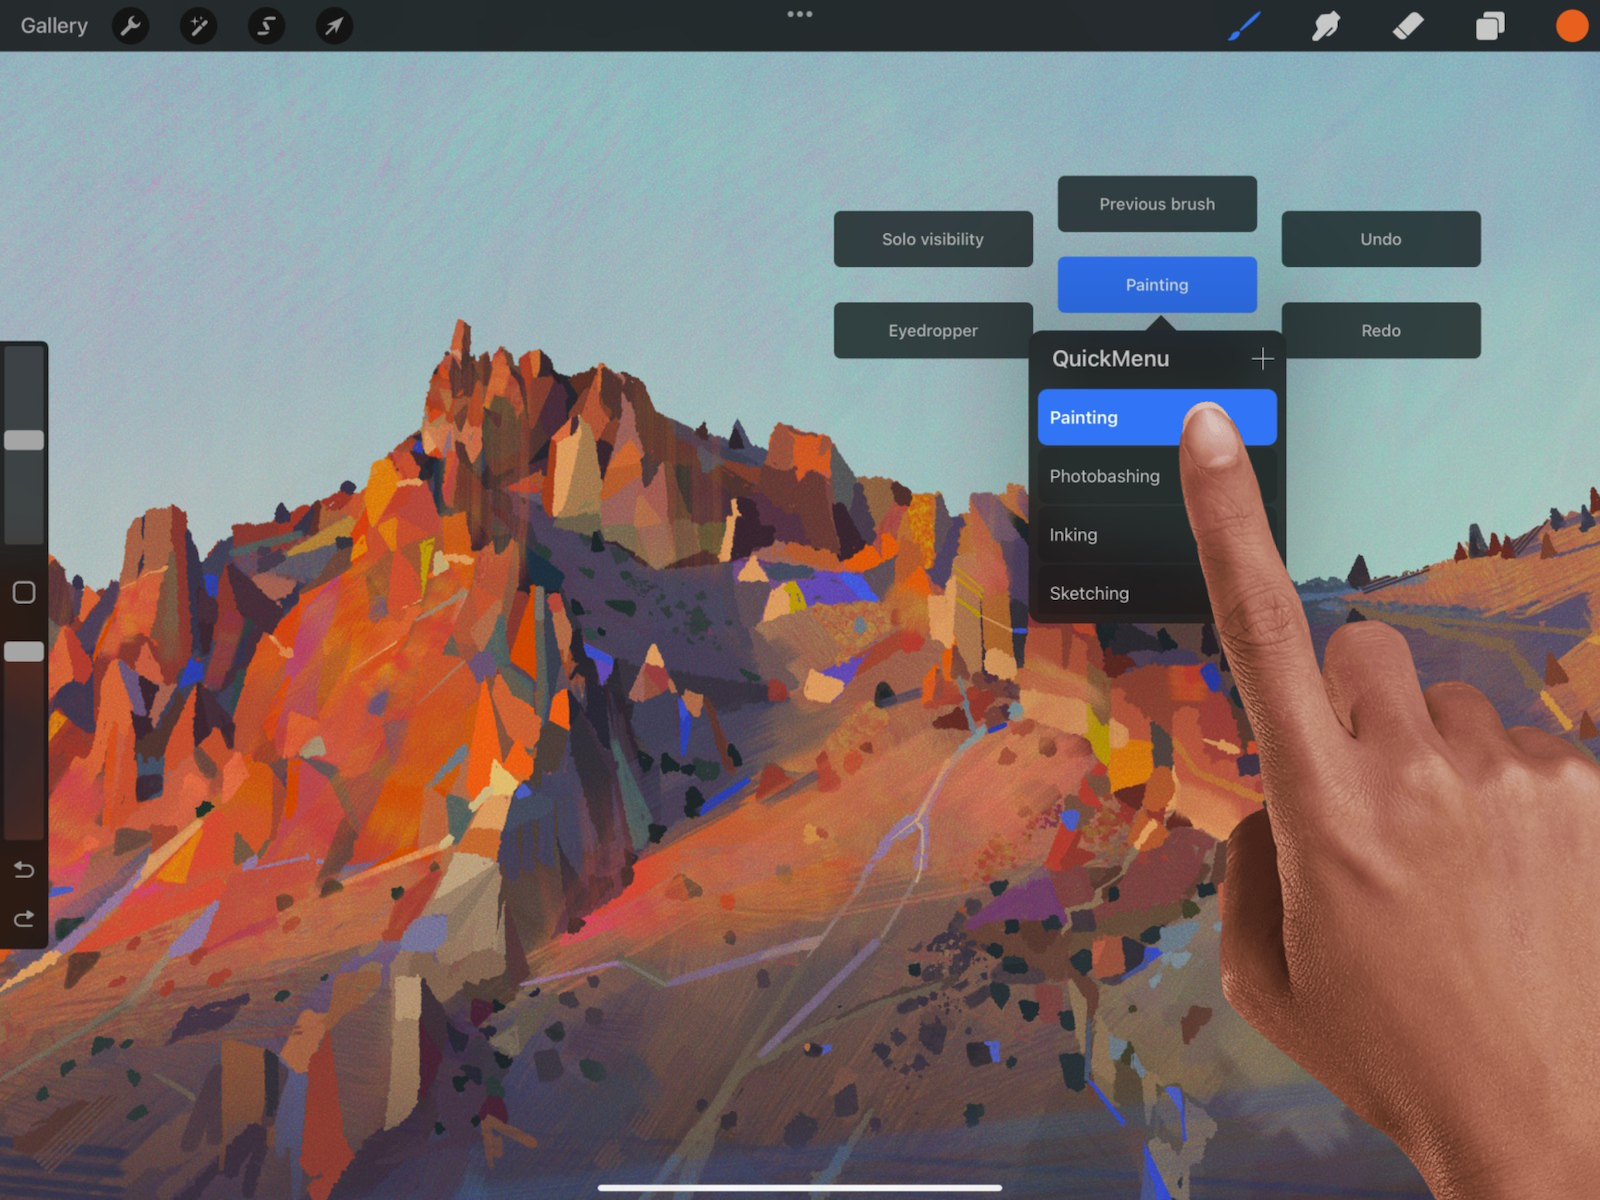
Gather your favorite shortcuts to always have them at hand.
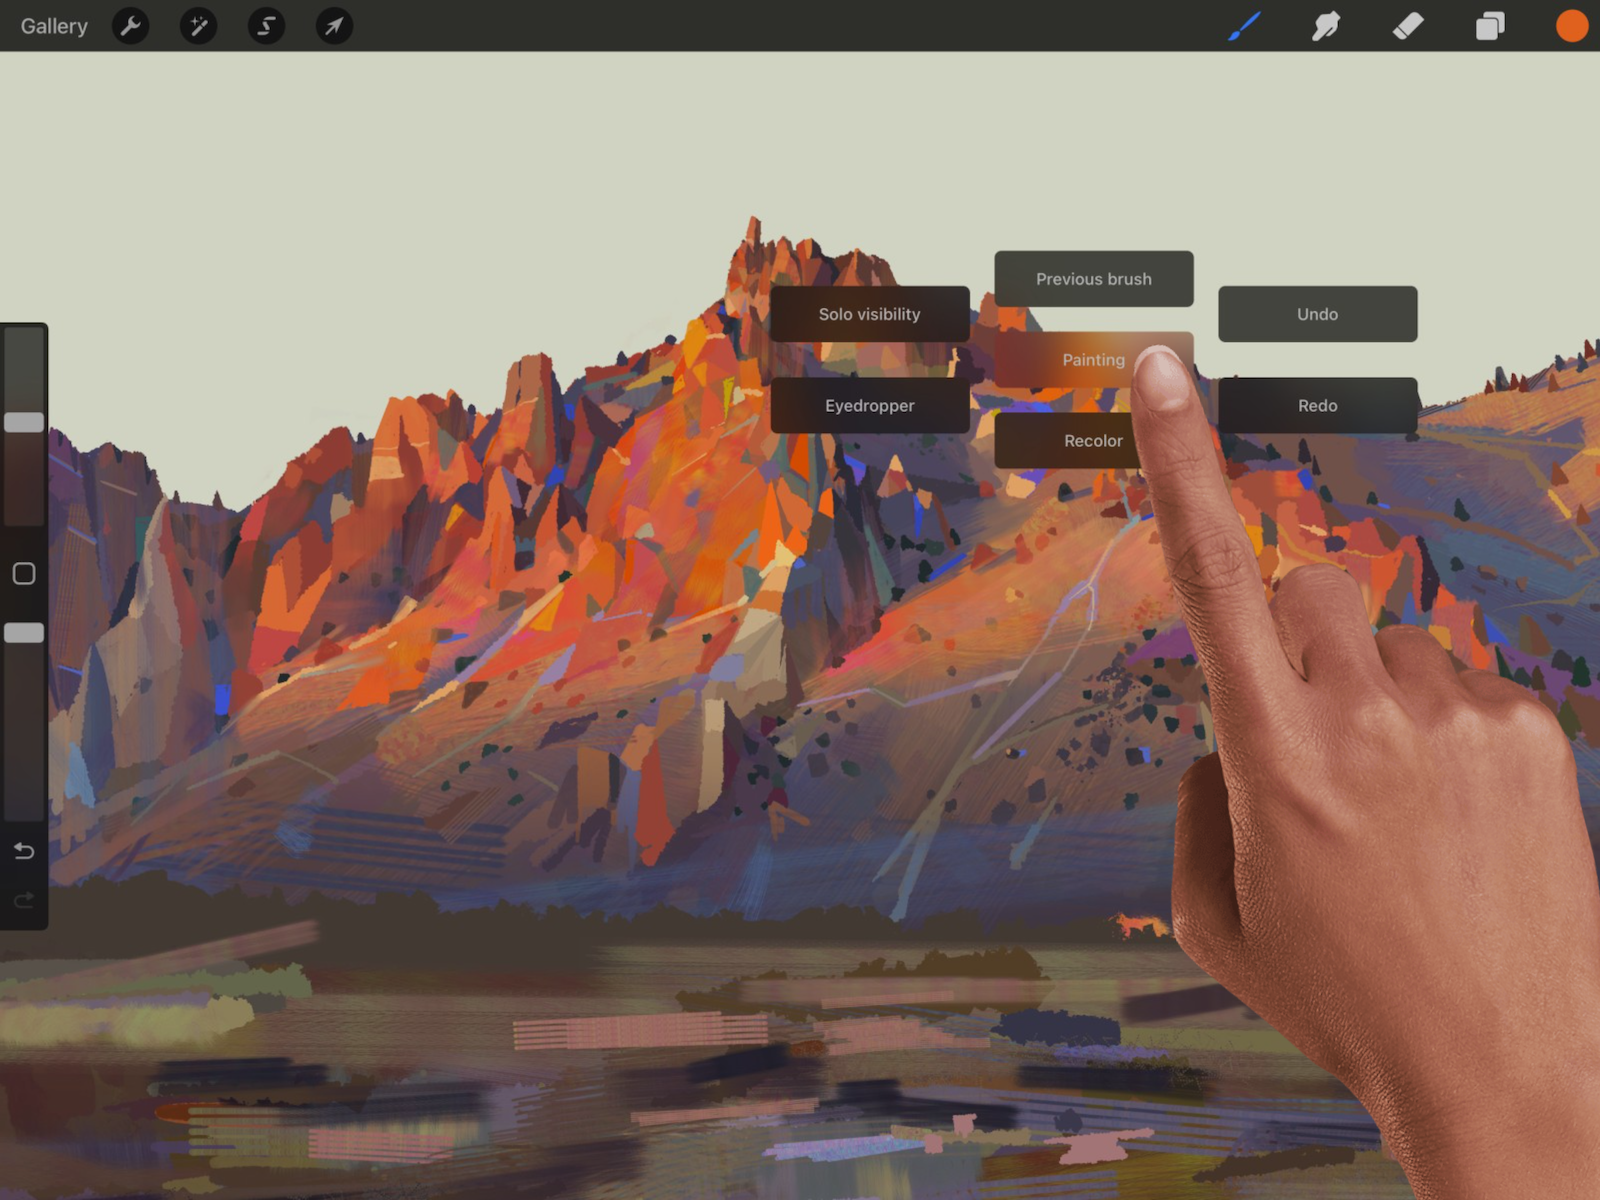
One of the most powerful, yet least known features in Procreate is QuickMenu. This fully customizable radial menu can be invoked with a single tap, and lets you work your way, fast! Before you can use QuickMenu it must be enabled by going to Actions > Prefs > Gesture controls > QuickMenu and selecting one of the eight gestures options that works best for your workflow. Once set, use your chosen gesture to invoke QuickMenu, then tap and hold on any of the six radial buttons to select a large range of Procreate shortcuts. We recommend selecting short cuts for the actions you perform most regularly.
If you have more than six shortcuts you want to use, or you want to set up a different set of shortcuts for your different ways of working (ie. painting, inking, sketching, etc.) you can tap and hold the QuickMenu Profile button in the middle of the radial dial to add as many profiles as you like. Want to know more about QuickMenu, and how to get the most out of it? Check out our previous QuickMenu article ‘Your workflow as quick as a flick.’
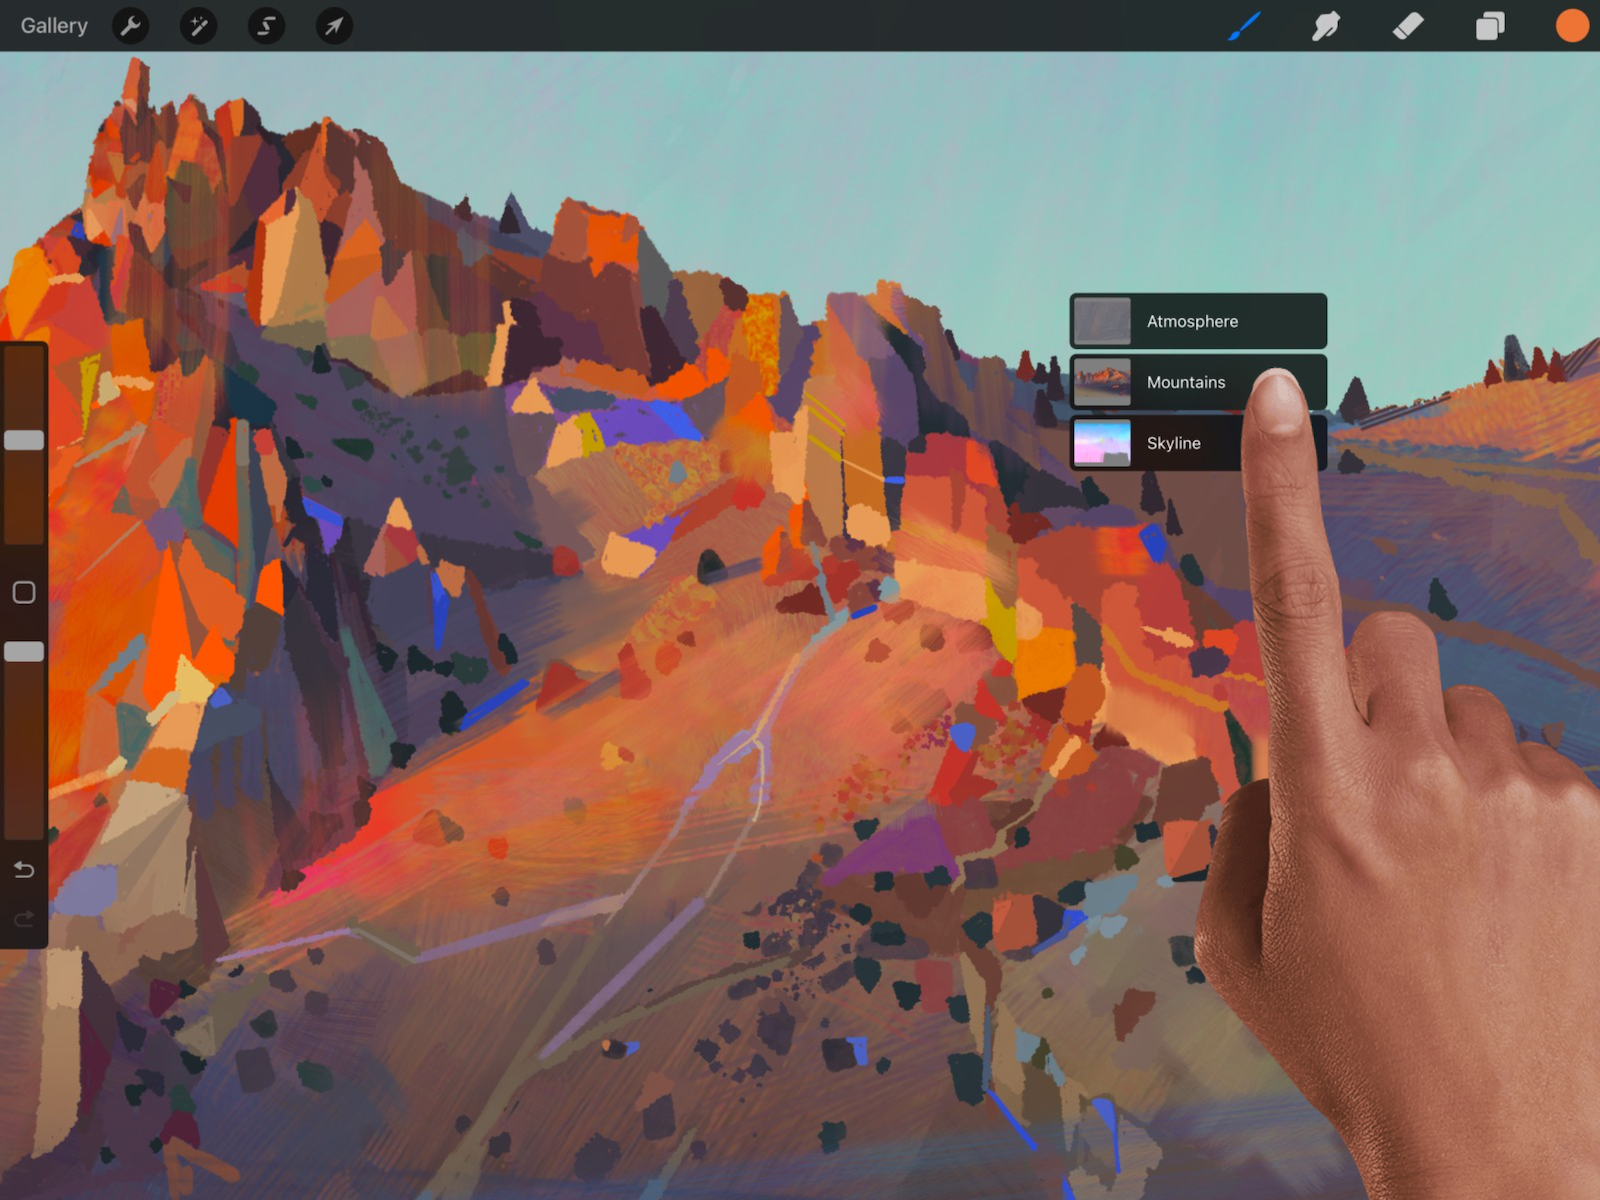
Turn on your Layer Select to seamlessly switch layers.
Layer Select lets you select a specific layer without accessing the Layers panel. Using a customizable gesture, Layer Select displays all the layers associated within an area of your canvas, allowing you to select the layer you want from a nifty mini-menu. To turn on this flow inducing feature, go to Actions > Prefs > Gesture Controls > Layer Select and set up one of four touch or Pencil gestures to invoke Layer Select.
While you work.
Use your new Layer Select and QuickMenu gestures.
You’ve set them up, now put them to work! The next time you need to select a layer or want to use a shortcut, simply use your customized gestures to stay on your canvas and away from menus. It may take a little time to commit these new time saving gestures to muscle memory, but once you do even Procreate professionals will be asking, ‘How did you do that?’
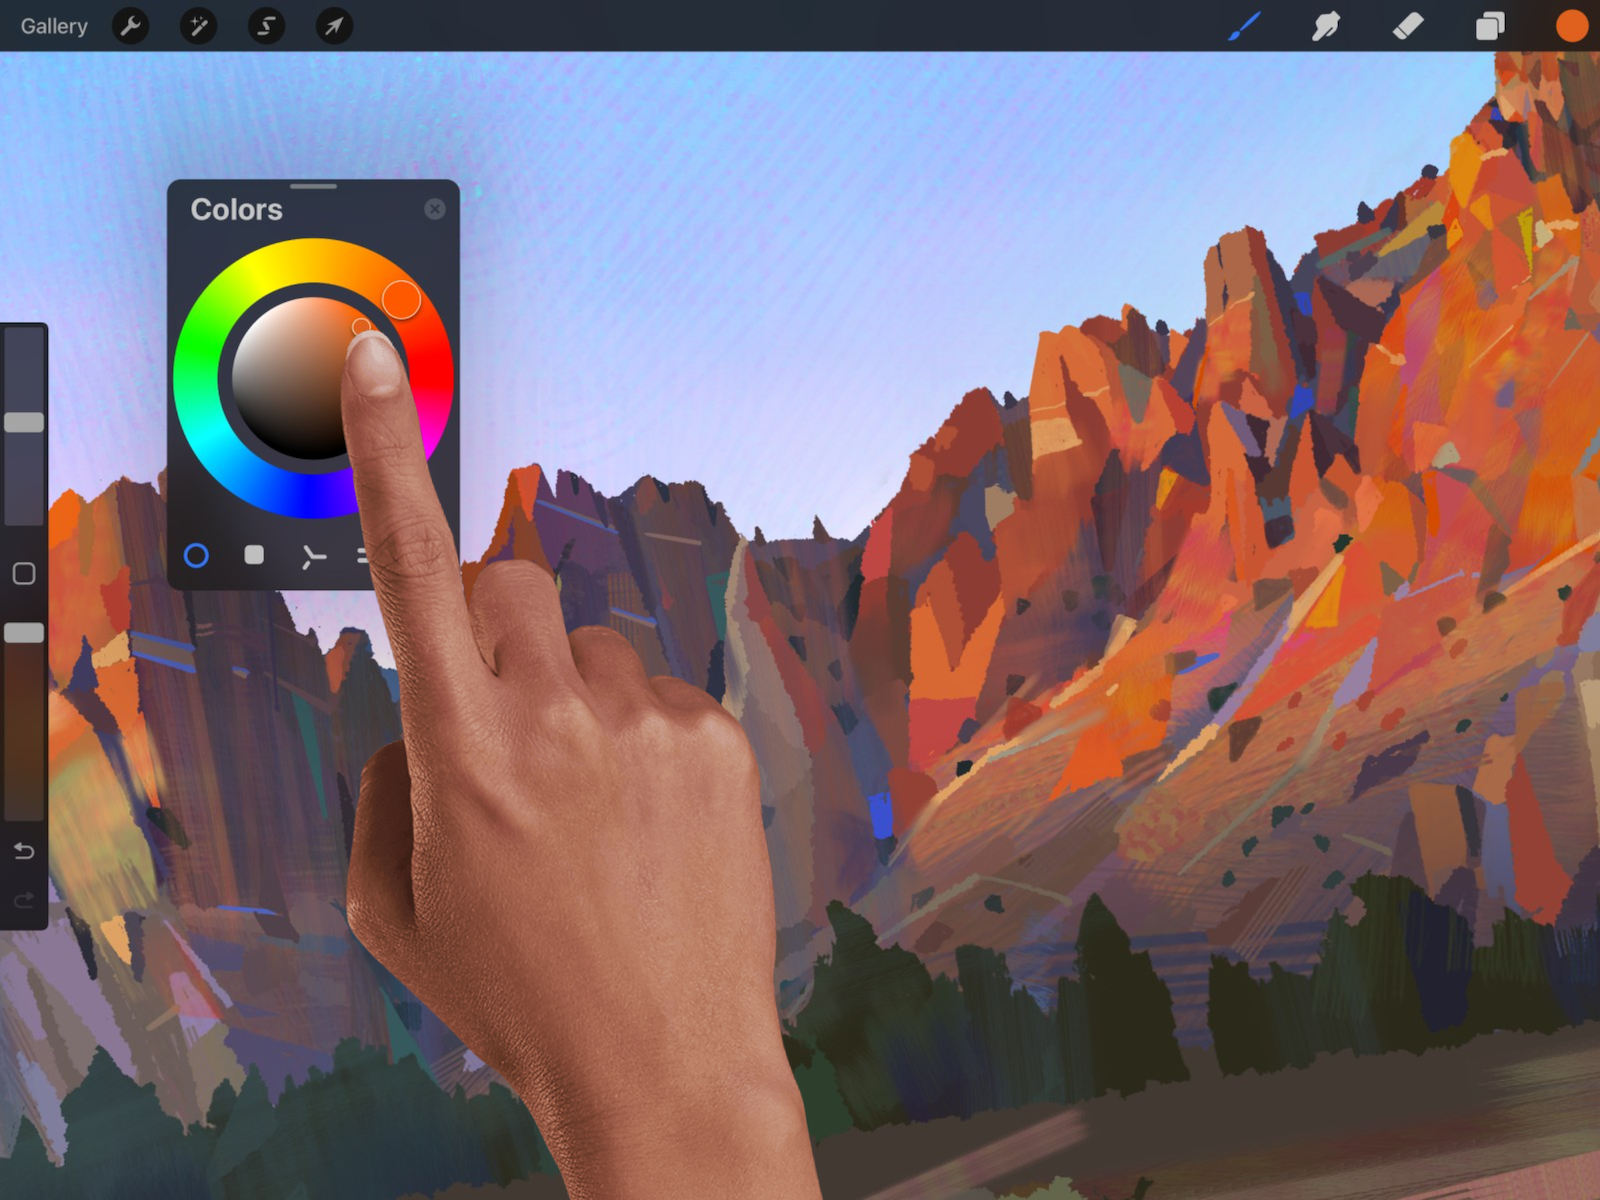
Keep your palette on-screen with Color Companion.
Going back into the Color Panel every time you need a new color is not flow friendly. Open your Color Panel, select Palettes then drag the small bar in the center at the top of the Color Panel away from the menu bar and onto your canvas. Now you have a handy ‘always-on’ Color Companion with your custom palette right where you need it.
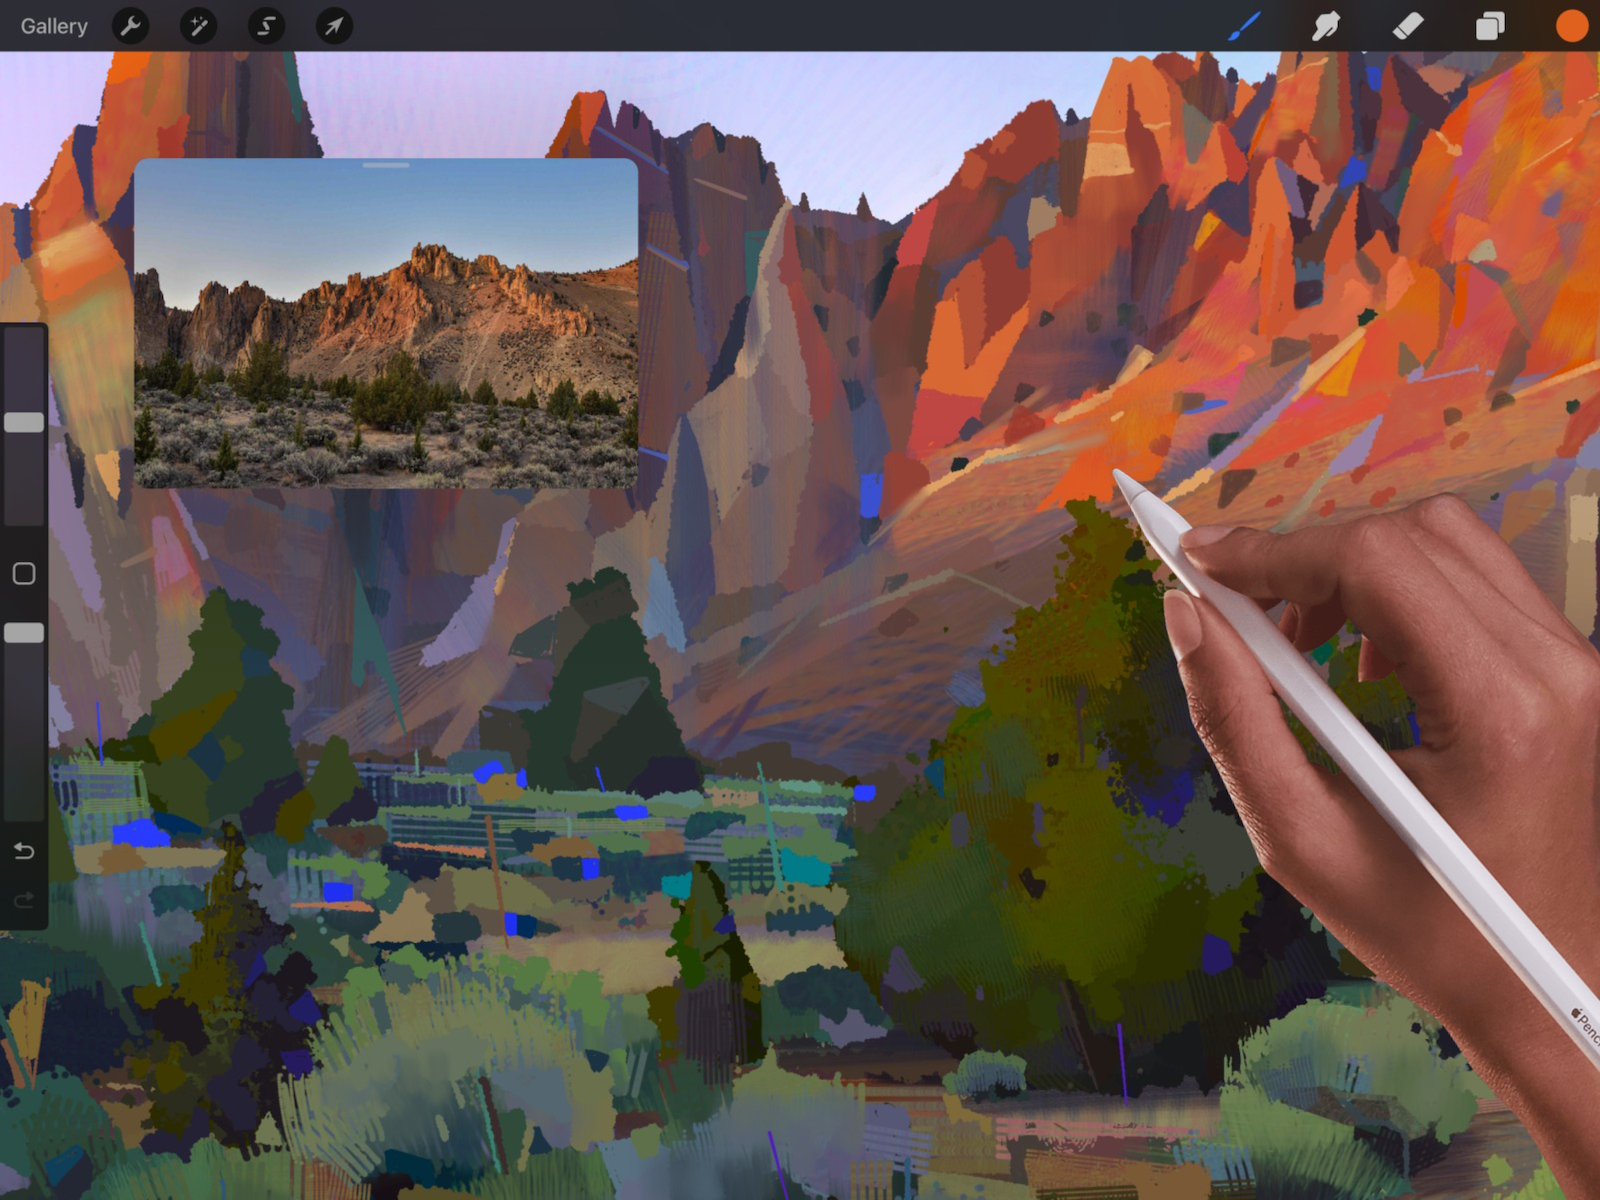
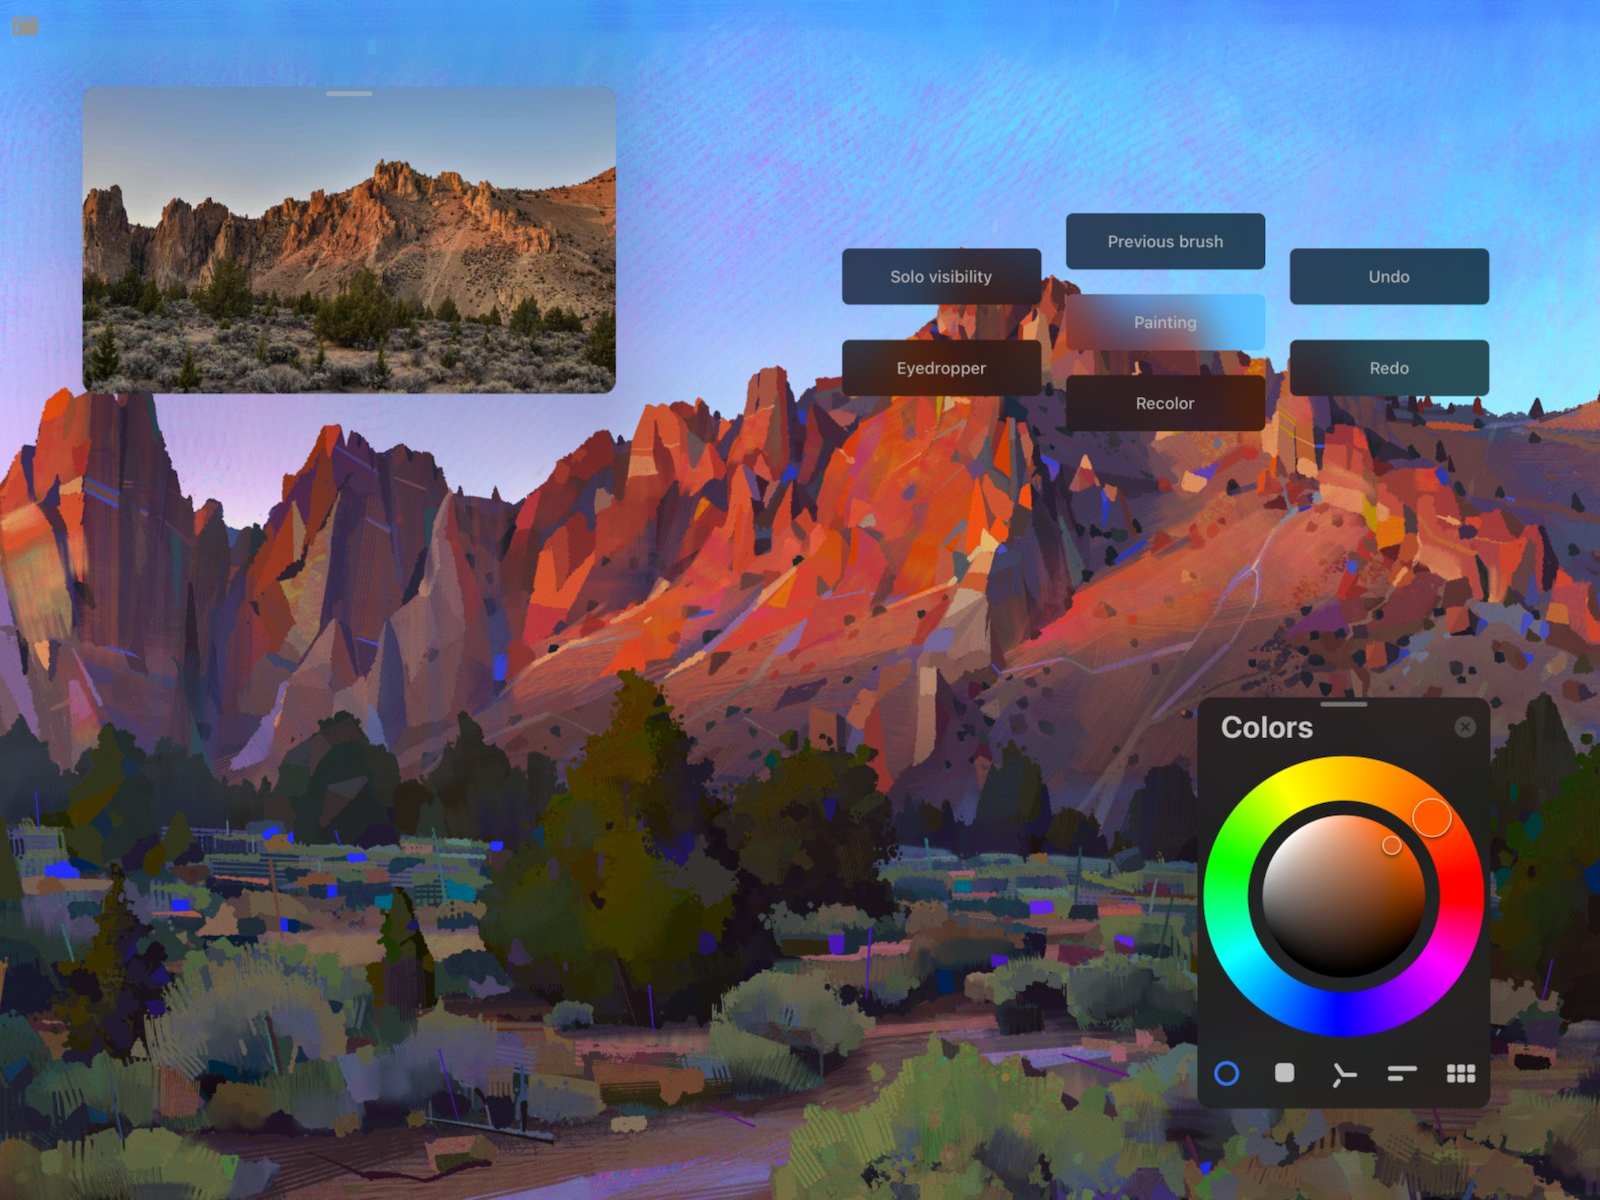
Work on the detail while seeing the big picture.
Another tool to keep you in the flow is Reference Companion. This shows a smaller representation of your canvas, or a reference image while you work. Reference Companion makes working on detail easier, as the companion image instantly updates when in Canvas mode, allowing you to see your progress across the entire canvas even when zoomed in. To turn on Reference Companion tap Actions > Canvas > Reference toggle on. Reference Companion can be especially useful when 3D Painting, allowing you to have any 3D model, 2D Texture, or reference image right where you need it.
Go completely distraction free with Full Screen mode.
Now you’re all set up and have everything you need, get deep into the flow zone with a quick four finger tap to remove all UI from the canvas. You can keep both your Color and Reference Companions on-screen if need be, plus use all your regular gestures to keep that flow state rolling. When you want the interface to re-appear, simply tap your canvas with four fingers again.
Achieving a flow state and getting lost in the moment doesn’t always happen straight away. Like anything it requires practice, but we hope the tips above help you find your flow state the next time you use Procreate. Once they become second nature, you’ll find unlocking the full potential and power of the flow and Procreate a breeze.